|
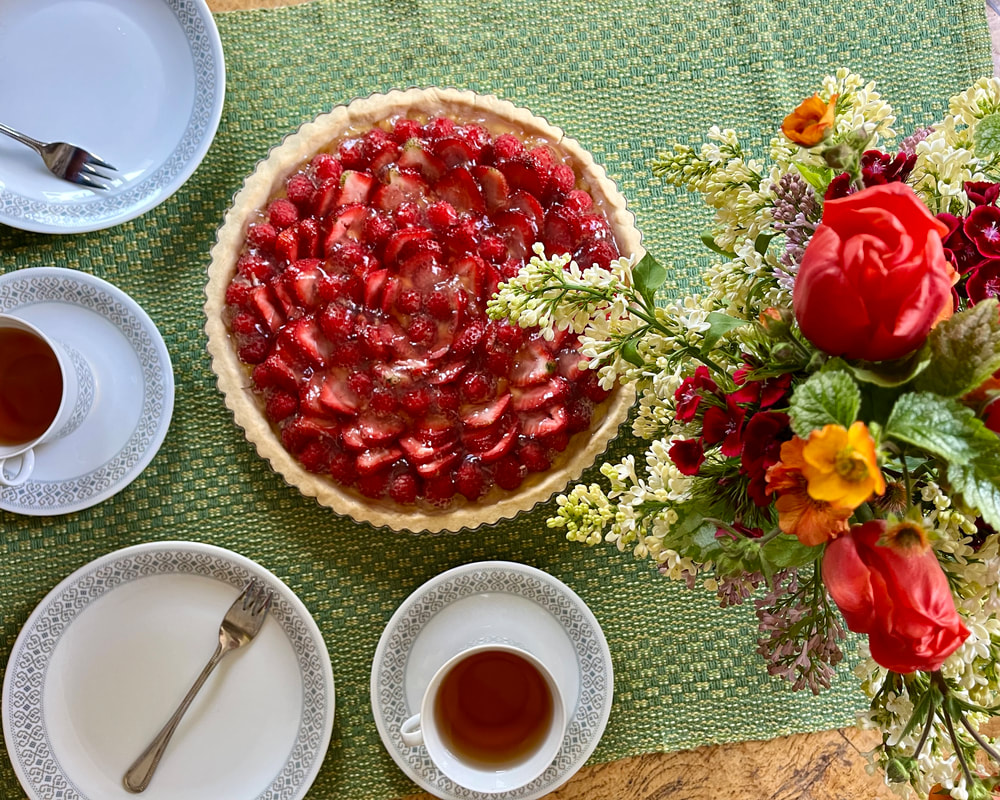
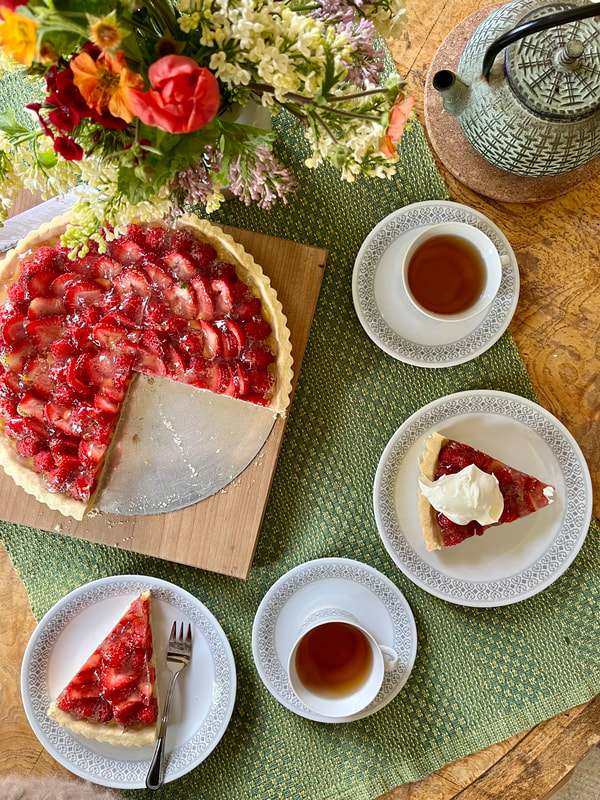
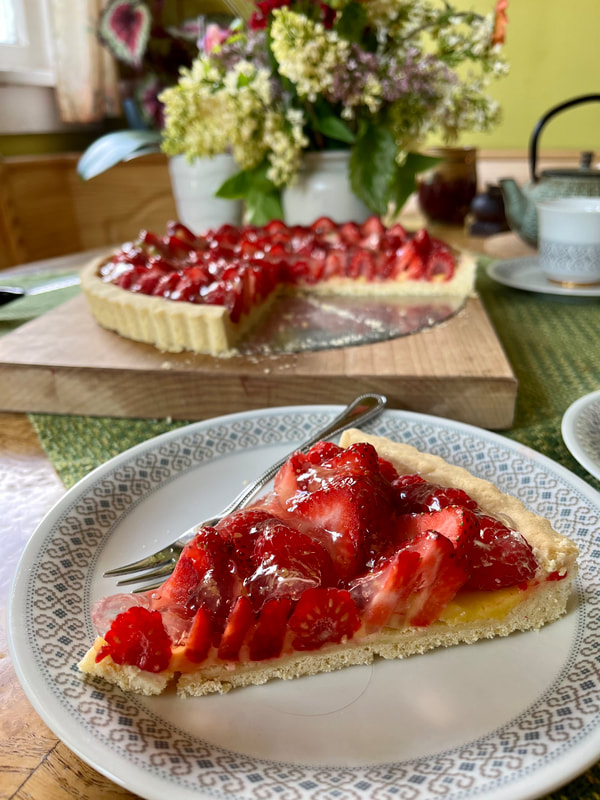
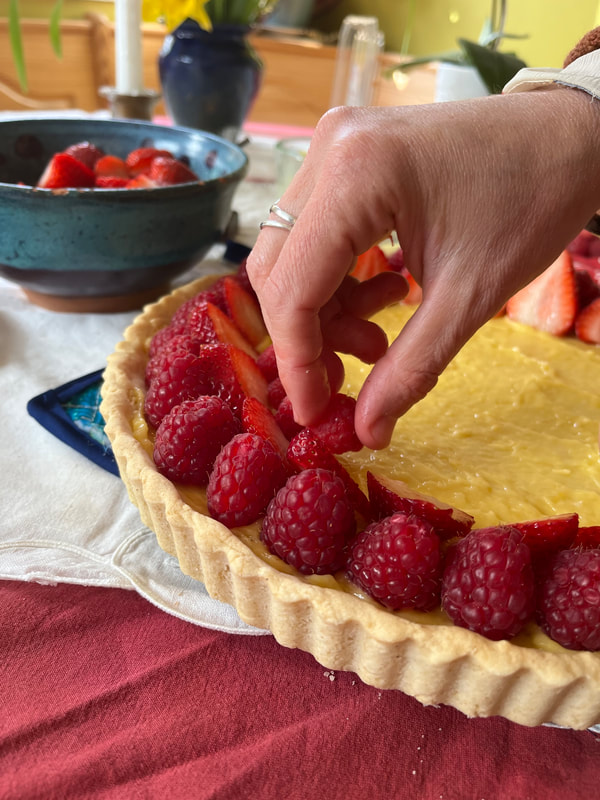
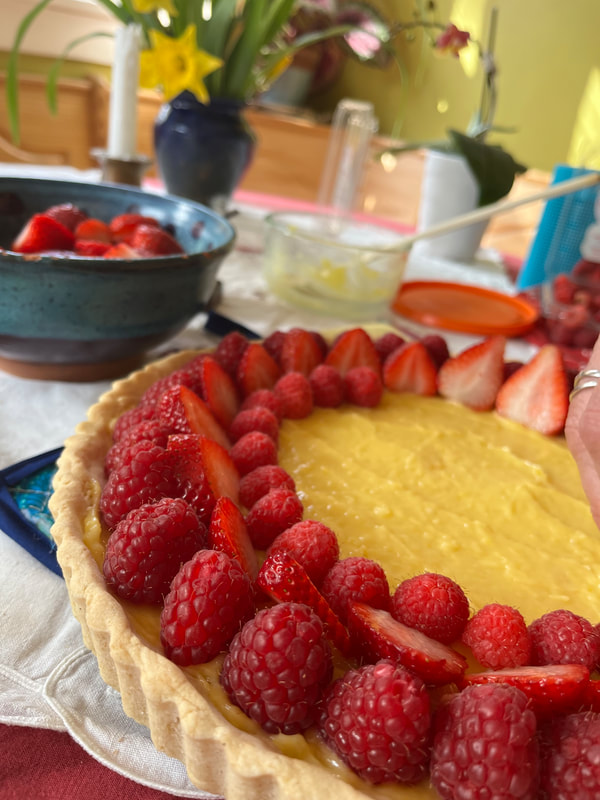
To celebrate Mother's day I would like to share my favorite spring tart. It is very refreshing, light, and symbolic of Spring and Summer. If you like lemony desserts then this is for you! Plus, it looks beautiful and is a wonderful dessert for any special occasion. Although each step is very simple and very easy, some steps do take some time. In order to make this tart with ease, I recommend making the cookie crust and lemon curd the night before so that you can sleep away the cooling time and quickly make the rest of the tart the following day. Fortunately, for those who may be on a restricted diet, this tart is gluten free and naturally low FODMAP if you stick with strawberries and raspberries. Also, it only contains butter, so those who are dairy sensitive may still be able to tolerate it. Serves 8. Sweet Cookie Crust: ½ cup softened salted butter (I use Kerrygold) ¼ cup sugar 1 egg 1 ¼ cup Bob’s 1:1 flour, plus more as needed ½ tsp baking powder Lemon Curd ½ cup lemon juice (~3 lemons) 1 whole egg 1 yolk 3 tablespoons natural cane sugar Zest of 1 lemon 2 T salted butter, flaked Berry Topping 1lb of organic strawberries, washed 12oz of raspberries (or another pound of strawberries) Optional: Any other berries of choosing Lemon Zest Gelee 1 cup (250ml) water, divided 2 ½ teaspoons gelatin or 1 packet Knox Gelatin Zest of ½ lemon 2 tablespoons sugar With a wooden spoon stir together the softened butter, sugar, and egg. Mix together the flour with the baking powder and gradually mix into the creamed butter mixture. Using the spoon and your hands mix dough until smooth, adding more flour as needed until the dough is no longer super sticky and easily handled. Gluten free flour will always be a bit more sticky than regular flour. Flatten into a disc and cover with plastic wrap or parchment paper. Refrigerate 1 hour or best overnight. When ready to bake the tart, remove the dough from the refrigerator and allow to warm up a bit until pliable and knead a bit. Preheat the oven to 350 degrees. Lightly oil the pan. Then roll out the dough (or see tip) to fit a 10” tart pan. Poke holes into the crust with a fork and bake for 20 minutes or until lightly golden. Allow to cool completely. Tip: Since gluten free dough tends to tear easily, and to avoid discarding bits of the dough, I prefer to break the dough into 4 or 5 equal chunks and divide it out directly onto the tart pan. Then using a baby bottle (without the top) I like to roll out the dough directly into the pan. Then using my fingers I spread the dough evenly into the sides. This way there is no transfer and all dough is used up. Meanwhile, while the dough is chilling, make the lemon curd. In a small saucepan simmer the fresh lemon juice over medium heat until reduced down by half. Pour into a small bowl and set aside to cool. Create a double boiler by filling a saucepan with about 2 inches of water. Bring to a boil and reduce to a simmer. In a ceramic bowl that is large enough to sit in the saucepan without the water overflowing, mix together the whole egg, the egg yolk, sugar, and lemon zest. Add the cooled lemon juice, and whisk together. Place the bowl into the medium saucepan, and whisk continuously until the mixture thickens. Using heat proof gloves remove from the heat and immediately add the salted butter flakes to the curd and whisk for about a minute to create a shiny smooth lemon curd. Transfer into a small glass jar and refrigerate. While curd and cookie crust are cooling, prep the berries of your choice. If using strawberries, rinse well and cut off the green tops. Depending on the size of the strawberry slice into half, thirds, or quarters to have even slices. If using raspberries, leave them as is because water tends to soften them too much. Rinse and dry blackberries or blueberries if using.
Once the cookie crust is cooled and the curd is cold, use a spatula to evenly spread the curd over the bottom of the crust. Then arrange the berries on top in any way that suits your fancy and refrigerate. Finally, pour ~1/4 of the cold water into a jar and sprinkle the gelatin on top. Pour the remaining water into a saucepan. Add the lemon zest and sugar and bring to a boil. Once boiling allow to simmer for a minute and then remove from heat. Add ~2 tablespoon of the hot liquid to the cold liquid and stir to combine. Then pour the cold liquid mixture back into the hot liquid mixture. Stir to combine. Transfer the gelee mixture into a glass or metal bowl and refrigerate until it is just starting to gel. You want it to be spoonable and thick like kefir, but not thin like water. Check after 30 minutes, then again every 5 minutes so that you don't miss the perfect texture. If it does gel too much, just sit the bowl into a warm water bath to gently warm up the gelee and thin up a little. Gently spoon the mixture evenly over the entire tart to cover the berries as best as possible. Then refrigerate the entire tart until the gelee has fully set and ready to serve. Best enjoyed within 3-4 days after making, if it lasts that long. For extra decadence serve with homemade whipped cream, but it’s not required because it tastes super yummy on its own.
0 Comments
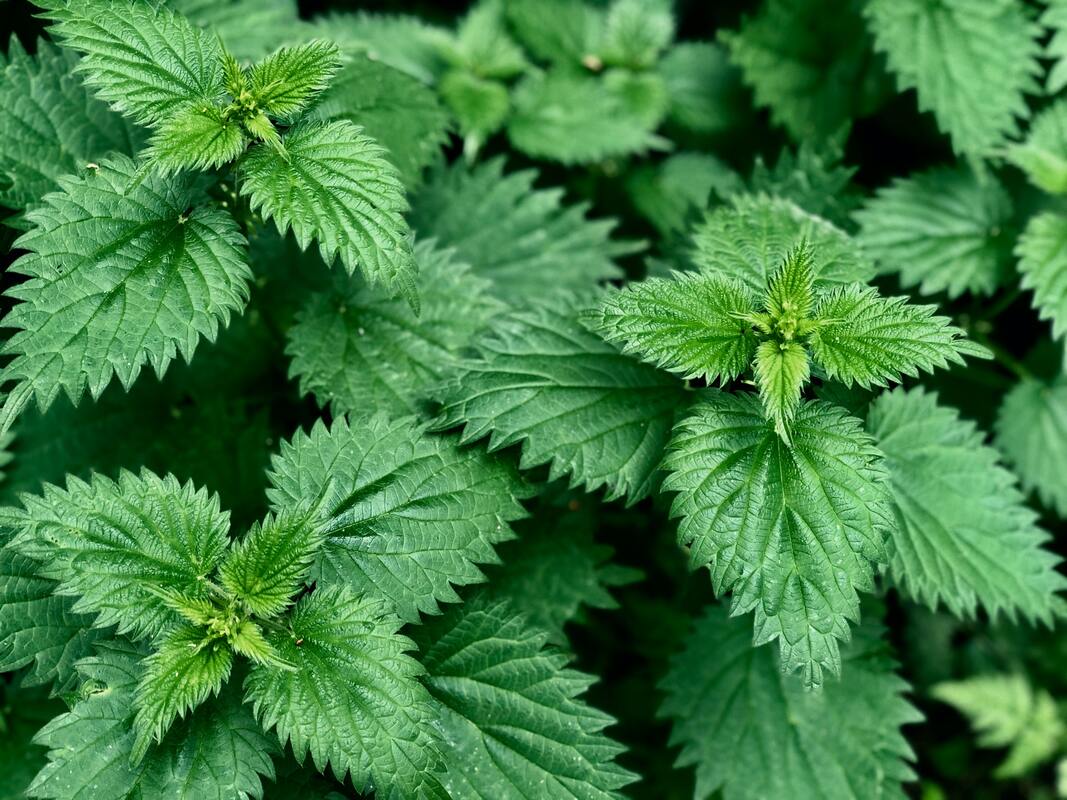
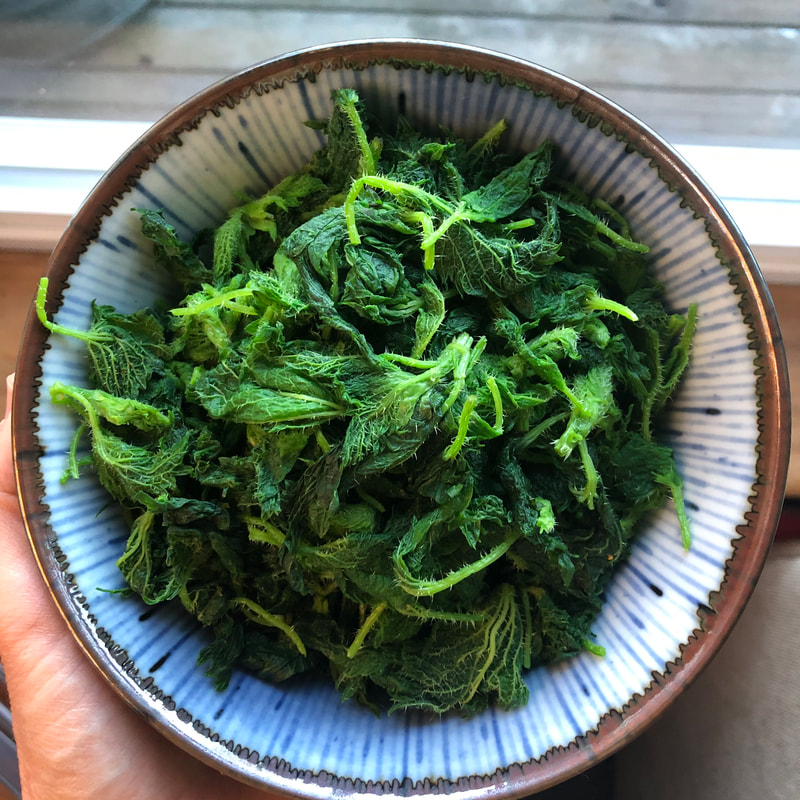
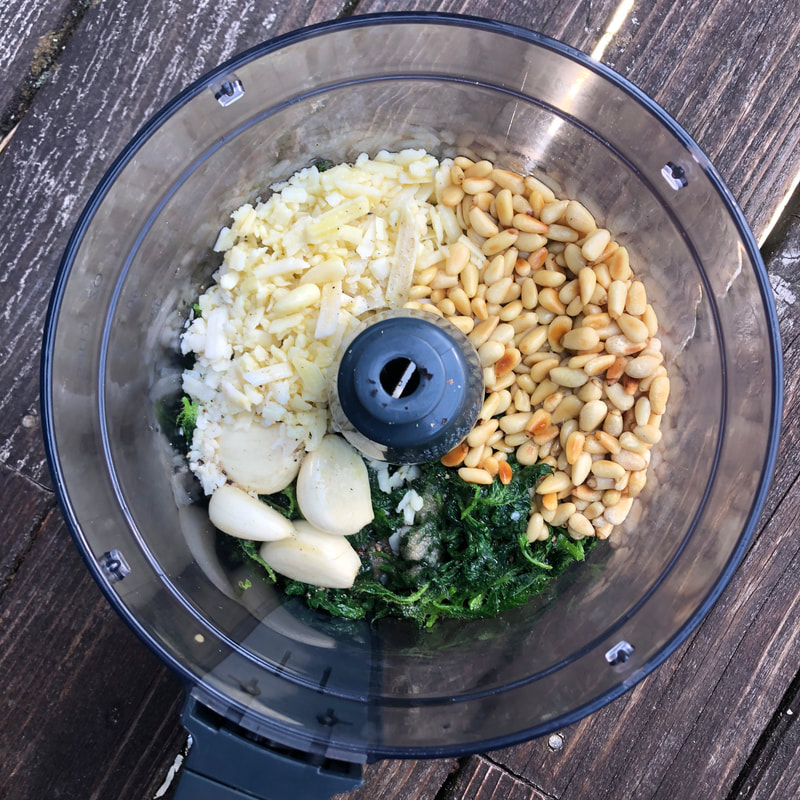
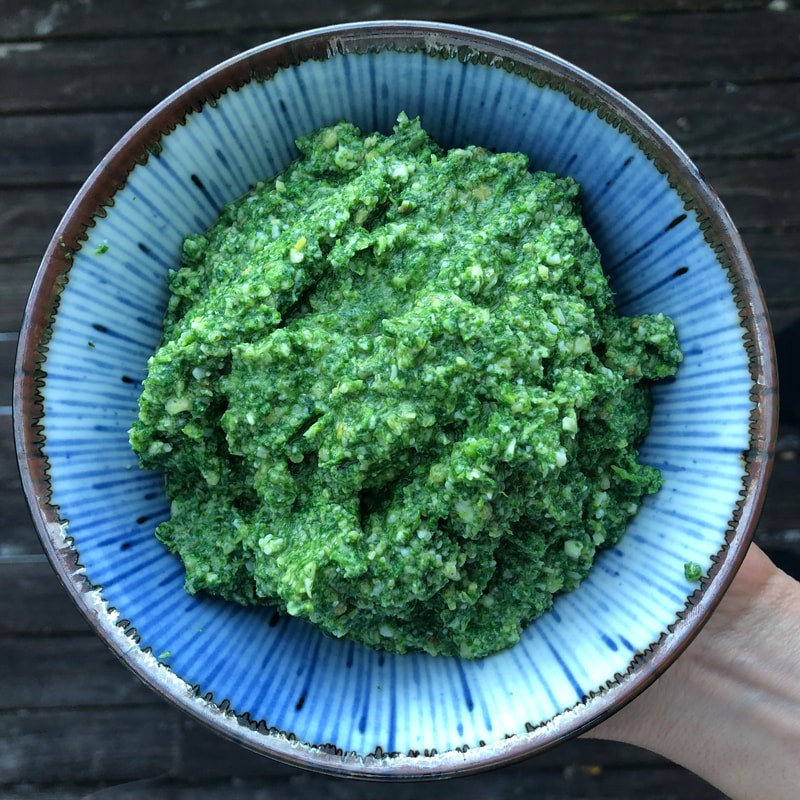
Nettles are originally from Northern Europe but are now found all over the world. They have been used for hundreds of years as a medicinal herb for hormonal imbalances, fatigue and lethargy, forgetfulness, allergies, constipation, and detoxification support. Hildegard von Bingen, a German nun and healer who was well known during the Middle ages, spoke of nettles highly. Today, functional medicine practitioners use nettles as part of treatment plans including seasonal allergies, detoxification, blood building, and balancing hormones. Besides their medicinal background, nettles are a very nutritive plant, rich in protein, vitamin A, vitamin C, calcium, and iron. It is also a great source of polyphenols, plant compounds known to provide many health benefits, including reducing inflammation and supporting the health of our good gut bacteria. However, today I want to highlight nettles and their ability to help reduce seasonal allergies. Nature often works hand in hand. As the pollens burst into the air with the first warm spring days, nettles start to pop out along trails in the Pacific Northwest woods. Individuals struggling with seasonal allergies may find relief from the consumption or supplementation of nettles because they help inhibit the production and release of histamine from mast cells as well as their breakdown. Mast cells release histamine in response to foreign proteins, such as pollens, causing the classic symptoms of allergies including a runny nose, itchy and red eyes, and sneezing. Furthermore, nettles have been found to inhibit COX-1 and COX-2, enzymes that play key roles in the inflammation cascade. Although, clinical studies are lacking, there is one study from 1990 that found some improvement in allergy symptoms with the consumption of 600mg of freeze-dried stinging nettle powder 1-3x per day. Another more recent study in 2017, found that 150mg of stinging nettle powder taken for 1 month, significantly improved symptoms compared to standard treatment of allergic rhinitis (anti-histamines and inhaled corticosteroids). However, the placebo group also had improved symptoms post-treatment. Although at present we only have two human clinical studies, that doesn't matter. Practitioners have used nettles successfully for thousands of years. This type of experiential clinical data also counts. How do You Pick Nettles? You will see nettles along your local hiking trail during the months of spring and early summer. You only want to harvest the top 2-3 tiers of leaves. The younger the plant, the more delicate and tender the flavor. Using gloves and a small scissor, cut the nettle at the desired point. If you don't want to forage for them yourself, farmers markets will often sell these during the early Spring months. How Do You Use Nettles? For starters you can buy nettle tea, and drink that. It is easy and requires minimal preparation. It is earthy in flavor. However, if you want to use nettles in your meals, I recommend making either nettle pesto (recipe below), nettle potato soup (recipe below), nettle frittatas or quiches, or use nettles any way you would use spinach. Personally, I feel like nettle pesto is the most versatile. You can make 1-2 batches, and freeze what you will not use right away. Then you can add cubes of thawed nettle pesto to soups, sauces, egg dishes, pasta (of course), parchment baked chicken breast or fish, etc. The list goes on. How Do You Prepare Nettles? First wash all your foraged nettles in clean cool water. Then, in order to use nettles culinarily, you must heat or vigorously process them to remove the sting. Interestingly, once the hairs on the nettle are broken, the nettle no longer stings. I personally prefer blanching nettles. Blanching gives the nettles a brilliant green color and makes them easy to handle and trim. Blanched nettles can be frozen for use later. Making Your Own Nettle Pesto The nice thing about pesto is it's versatility. I suggest making two batches of this delicious pesto to freeze for year round nettle infusions. You can also add basil or other herbs to this as desired. Makes ~ 3 cups. INGREDIENTS 1 produce bag full of raw nettles (to make about 2 cups blanched and trimmed nettles) ½ cup toasted pine nuts ½ cup organic extra virgin olive oil ½ cup grated parmesan or pecorino 3-4 cloves garlic 2-3 tablespoons lemon juice Sea salt (I used ½ teaspoon) Fresh ground pepper DIRECTIONS Soak the nettles in fresh, clean water. Meanwhile, bring a large pot of salted water to a boil. Using tongs, transfer the nettles into a colander, and then transfer to the boiling water. Blanch for 1 ½ minutes. Meanwhile, make an ice bath with 1 tray of ice cubes and a bowl filled with cool clean water. Transfer the blanched nettles to the ice bath and let sit a few minutes and strain. Once the nettles are strained, squeeze the nettles by hand, to squeeze out the excess water. Transfer to a clean kitchen towel and spread them out. Using your scissors, cut the thicker stems off, leaving behind only the leaves and delicate stems. Measure out 2 cups of these blanched and trimmed nettles and transfer to a food processor along toasted pine nuts, olive oil, cheese, garlic, lemon juice, salt and pepper. Pulse until cohesive but not too smooth. Adjust salt, pepper, and lemon juice to your liking. Freeze what you don't use right away in a silicone ice cube tray or small glass mason jars. Nettle and Potato Soup
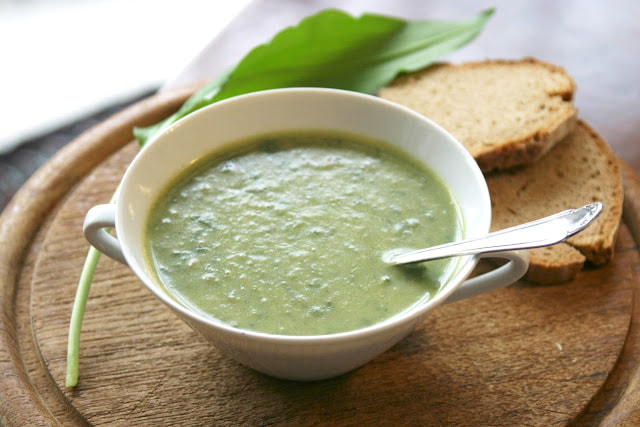
Another less work intensive recipe for nettles is simply soup! This creamy, green soup can easily be made dairy free by substituting the cream for canned full fat coconut milk. Use bone broth in place of vegetable broth to increase the protein if desired. Serves 4-6 INGREDIENTS 2 tablespoons extra virgin olive oil 2 small shallots, diced 2 cloves garlic, finely minced 3 medium sized yellow potatoes, rinsed and dice 2-3 slices bacon, cut into small pieces (or ¼ cup diced pancetta) 3-4 handfuls rinsed baby nettle leaves, base stems trimmed* 3 cups vegetable broth or bone broth 1/3 cup heavy cream (may replace with canned full fat coconut milk) 1 tablespoon honey Juice of ½ lemon Splash of apple cider vinegar (optional) Pinch of red chili flakes (optional) Sea salt and pepper to taste Garnish with fresh parsley DIRECTIONS Heat a soup pot over medium heat. Add the oil and when hot, add the shallots, garlic, diced and bacon/pancetta. Allow the shallots to turn glassy and the pancetta to turn crispy. Stir occasionally. Add the nettles to the pot sauté until wilted. Add the potatoes and pour in enough vegetable broth until the potatoes are covered. Bring the soup to a simmer for about 15 minutes, or until the potatoes are tender. Once the potatoes are tender, remove the pot from the burner, and using an immersion blender puree the soup. Return the pureed soup back onto the burner and heat on low. Next add the cream and honey. Stir well to combine. Finally, add the lemon juice and a splash of apple cider vinegar to brighten the soup. Season with chili flakes, sea salt and pepper to taste. You could even add some frozen nettle pesto if desired. Garnish with fresh parsley. Serve with buttered fresh bread and a side salad. *Note: By trimming the nettles, and leaving only the delicate stems, keeps the soup more delicate and smooth. Maple Glazed Roasted Carrots
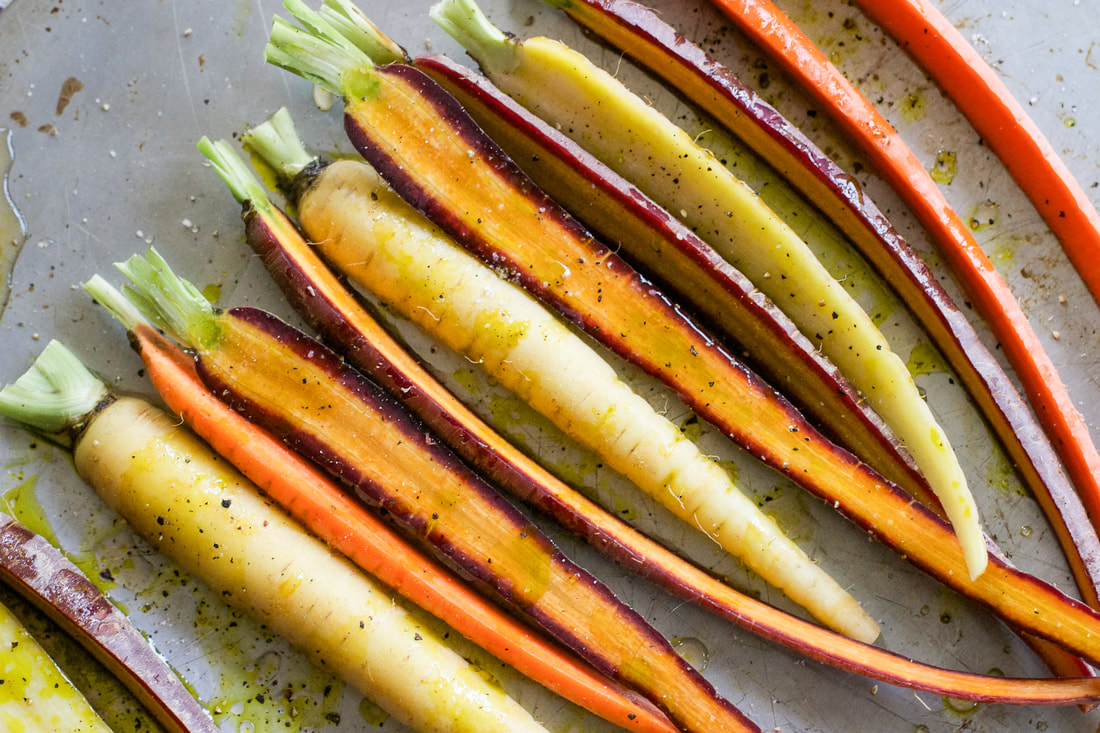
This simple dish is great throughout the year and pairs really well with grass-fed beef or lamb. If you want to be extra fancy use rainbow carrots for a full display of color! Serves 2-4 Time: 30-45 minutes INGREDIENTS 1 bunch carrots (with green tops) 1 tablespoon maple syrup 1 tablespoon extra virgin oil 1 tablespoon apple cider vinegar Salt and pepper Finely minced parsley or cilantro (optional) DIRECTIONS Preheat oven to 425 degrees. Meanwhile cut off the green tops leaving an inch at the top of the carrot. Save the greens to make carrot top pesto or to toss into salads if desired. Wash and scrub the carrots and towel dry to ensure they are completely dry. Line a baking sheet with parchment paper and set aside. If the carrots are thin and long, leave whole and place on the parchment paper. If the carrots are a little thicker, cut in half lengthwise. Place onto baking sheet in a single layer. Mix together the maple syrup, olive oil, and vinegar in a small bowl. Drizzle over the carrots. Sprinkle with salt and pepper. Roast for 20-25 minutes until tender, yet still firm with browning spots. Remove from oven and sprinkle with freshly minced parsley or cilantro if desired. Serve immediately. Note: You can use honey in place of maple syrup. |
RecipesI hope you enjoy my creative, flavorful, and nutrient dense approach to whole foods cooking. All recipes are gluten free. Archives
December 2022
Categories
All
|


 RSS Feed

