|
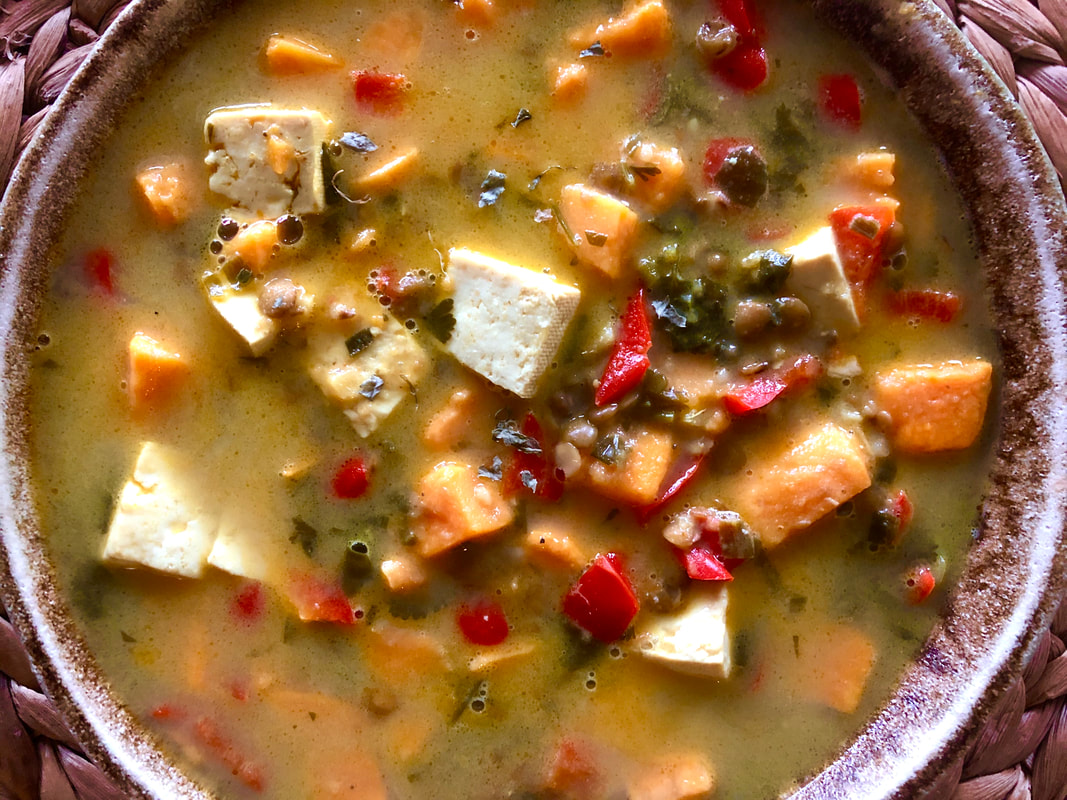
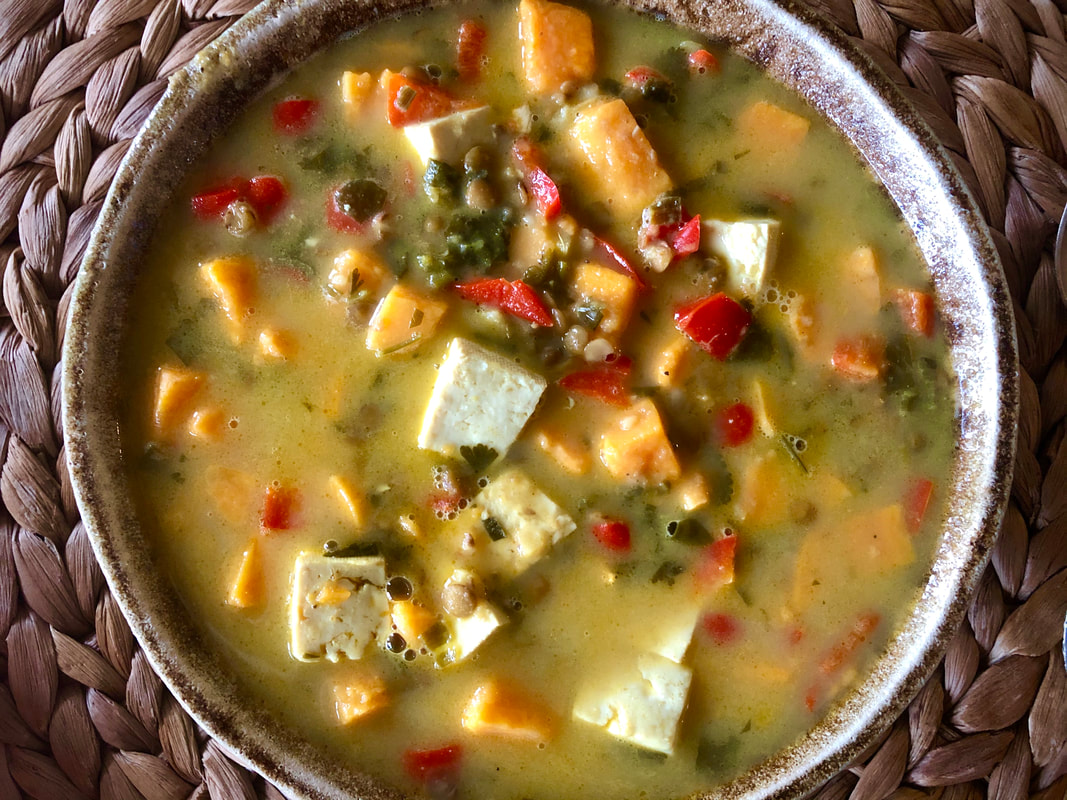
Got tummy discomfort? Then try this low FODMAP soup that will leave you feeling satisfied and full. It can be easy to get stuck eating very simple, bland meals if you are following a low FODMAP or SIBO type diet. I cannot tell you how often I hear patients tell me they eat baked chicken, zucchini, and white rice. This does not have to be the case! The more you are able to enjoy your food, and the more variety you have in your diet, the better it is for your gut and for your recovery. I love soups! First of all they are cozy and warming and secondly soups are a wonderful meal for anyone struggling with digestive distress. Since the vegetables and proteins are softened during the cooking process they are easier to digest. Plus, soups catch all the vitamins/minerals in the broth that may be lost with other methods of cooking. My Hearty Veggie Curry Soup is rich in plant based protein and fiber, yet still low in fermentable fibers. Beans and legumes are often high in GOS (galactooligosaccharides) which can cause uncomfortable symptoms in patients with IBS and/or SIBO. Canned brown lentils, however, are low in FODMAPs but still pack a good punch of fiber (9g per 1/2 cup serving) helping to move stool through the digestive tract. Plus when lentils are paired with extra firm tofu, you get 17g of plant protein per serving of soup, keeping you full for longer. If you are craving a delicious soup that all will enjoy, then try this Hearty Low FODMAP Curry Soup. I specifically chose Whole Foods Chicken Stock (not low sodium) because it is naturally low FODMAP and easily accessible. You don't have to order it online nor do you have to plan ahead to make your own stock. If you want to keep the soup vegan, you are welcome to make your own low FODMAP vegetable stock or consider using FODY Vegetable Soup Base as an alternative. Serve with a side green salad and a hot tea for an uber nutritious and cozy meal. Hearty Veggie Curry Soup (Low FODMAP) Serves 6 INGREDIENTS 1 tablespoon extra virgin olive oil 1 tablespoon minced ginger root 6 green onions, green parts only, finely sliced 2 medium sweet potatoes, peeled and diced 1 large red bell pepper, diced 1 ½ teaspoons yellow curry powder 2 cups Whole Foods Organic Chicken Stock (or FODY vegetable soup base) 1 can organic full fat coconut milk 1 can Westbrae canned lentils, rinsed and drained 1 pkg extra firm tofu (in liquid), diced ½ teaspoon sea salt Fresh ground pepper 1-2 tablespoons apple cider vinegar (or lemon juice) 1 bunch cilantro or parsley, finely chopped DIRECTIONS Prep all the produce. Then, in a soup pot heat olive oil over medium heat. Once hot, reduce to medium low and add minced ginger root and finely sliced green onions. Stir and cook for about 2 minutes or until fragrant and onions glassy. Stir in diced sweet potatoes and bell pepper, and then add the curry powder. Sauté veggies stirring occasionally for another 3-5 minutes. Pour in 2 cups of stock or another low FODMAP alternative broth. Bring mixture to a simmer and cook covered stirring occasionally, until sweet potatoes are tender, about 10-15 minutes. Remove the lid and stir in the full fat coconut milk, canned lentils and diced extra firm tofu. Season soup with sea salt and fresh ground pepper. Allow the soup to simmer on low for another 10 minutes to allow the flavors to infuse. Stir in 1-2 tablespoons of apple cider vinegar or lemon juice to brighten the flavor of the soup. I suggest starting with 1 tablespoon and adding a little more per preference 1 tsp at a time to avoid making it too sour. Stir in chopped cilantro, and adjust salt and pepper to taste. Serve with a green salad if desired. Note: In place of tofu you can use pre-cooked diced/sliced meat and add into the soup. Nutrition (per serving): 320kcal, 24g carbs, 8g fiber, 19g fat, 17g protein. Let me know what you think!
Happy soup season :) Selva
1 Comment
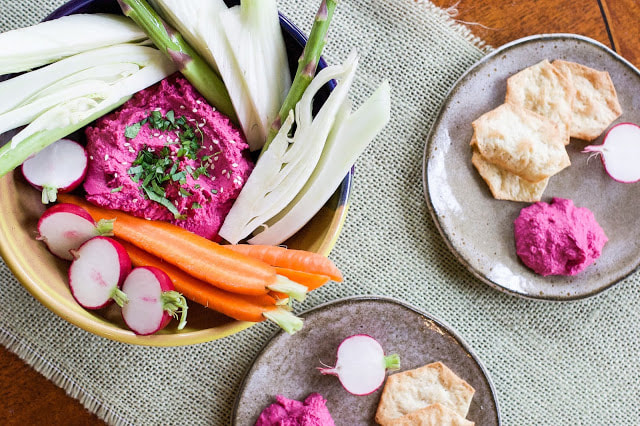
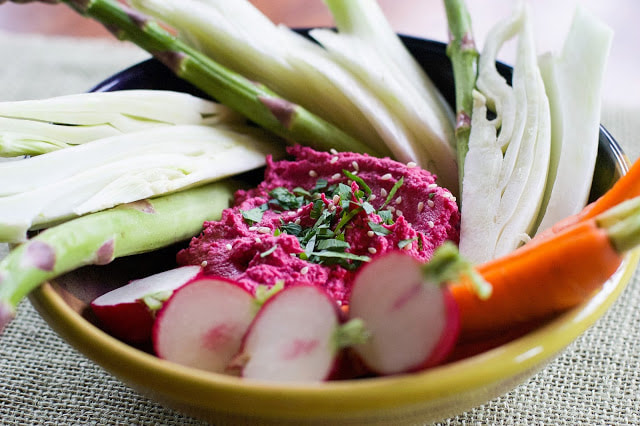
Hello my friends! Say hello to Summer weather! After such a grueling long winter, with months of clouds and rain, we now have the blue skies we have been longing for. To celebrate this wonderful change in seasons I have two super tasty recipes to share with you today. One was inspired by my favorite restaurant in town, the Temple Bar. I have never really eaten hummus as a meal. But after having such a wonderful experience, I am now a hummus advocate, especially in the summer. No longer is hummus just a spread or a dip for an easy snack, but it can easily become a hearty and satisfying meal...just make the portion size larger! Plus once you try the recipes below...you will never want to go back to store bought hummus...honestly. These recipes are creamy, super tasty, and budget friendly. A win-win situation. Secrets on How To Make The Perfect Hummus First of all the big difference is I start with dry chickpeas. If you want a creamy, smooth, and delicate hummus, you have to start from scratch. Trust me, the little extra forethought is worth it! Otherwise you will get chunky, thick, and gritty hummus. Secondly, you must choose Pedrosillano Cafe Garbanzo Beans. These smaller versions of your traditional chickpea, are the choice for hummus makers because they are creamier in consistency and have a nuttier flavor. Luckily you do not have to look far. If you live in Bellingham, you can find these in the BULK section of the Bellingham Food Co-op. For the rest of you, if you can't find them at your local health food store, I encourage you to purchase them online. Thirdly, especially for the traditional hummus, try serving it warm. Yes, warm! Of course you can still eat it cold, but warming up the hummus increases the aroma and tastes much more satisfying and satiating than cold hummus. At least...in my opinion. Versatility of Hummus Many people enjoy hummus with vegetables and crackers like shown above. However, you can serve hummus as a base, topped with grilled or baked fish. You can even top it with some lamb or grass-fed beef. Also, you can layer hummus like a "bean dip". Simply put a layer of hummus in a dish, top with finely diced cucumber, bell peppers, or tomatoes, and fresh herbs, drizzle with olive oil and sprinkle with salt. This is great for easy dipping! Of course you can also use it as a spread on sandwiches and wraps. However, I just love the simplicity of serving it alone with fresh seasonal veggies (raw, steamed, or roasted), especially in the summer. Now get soaking! Whether you make the beet or traditional version, you will love it! Traditional Middle Eastern Hummus Hummus made from scratch is easy, cheap, and the quality is far better than what you can find at the grocery store. I personally love to make a batch of traditional hummus, scoop out half from the processor, and then add additional spices or veggies for some extra FLAVOR and FUN. Then I have two flavors in one single batch. Alternatively, you can make a whole batch of beet hummus if you want (recipe below). Also, hummus freezes wonderfully! If this batch is too much hummus, put half in the freezer for another warm Summer day. Makes about 3 cups (serves 4-6) INGREDIENTS 1 cup dried Pedrosillano café garbanzo beans (smaller chickpeas) 1 1/2 teaspoons baking soda, divided 1/2 cup tahini paste (organic toasted) Juice of one large lemon (~3-4 tablespoons) 3 garlic cloves, coarsely chopped 1 teaspoon Real sea salt Extra virgin olive oil Maldon's Salt (optional, but almost necessary in my opinion) Other Add In's If Desired Fresh Herbs (oregano, thyme, rosemary, etc) Spices (chipotle, cumin, curry, etc) Steamed or roasted beets or carrots Additional Toppings Smoked paprika (optional) Roughly chopped parsley (optional) DIRECTIONS Place the chickpeas into a bowl and cover with double their volume of cold water. Add 1 teaspoon baking soda to the chickpeas. Soak the chickpeas overnight, at least 12 hours. The next day, drain and rinse. Place the soaked chickpeas and remaining ½ teaspoon baking soda in a medium saucepan and cover with double their volume of cold water. Bring to a boil, then simmer on low for 30-45 minutes, or until soft and easy to mush. Spoon off foam during cooking. Add more water during cooking if necessary to keep them immersed. Strain the chickpeas and retain a little of the liquid. Alternatively, you can cook the chickpeas in the InstantPot on high pressure for 8 minutes. Then let the pressure naturally release for ~10 minutes, then release the vent manually. Transfer the warm chickpeas to a food processor, add the tahini, 1/4 cup lemon juice, garlic, and sea salt. Process for 1-2 minutes, or until totally smooth. Add some of the cooking liquid if additional liquid is needed and process again. You want the mixture to be very soft and smooth. Taste and add more salt if you like. Keep warm. At this point if you want to make a half/half batch, transfer half of the traditional hummus into a glass container. Then add 1-2 steamed medium beets for a beet hummus, some roasted carrots for carrot hummus, or 1-2 tablespoons chopped fresh herbs (like oregano, thyme, rosemary, etc) to the processor and blend until smooth. Sometimes I like to add some chipotle powder or smoked paprika to my beet hummus or some cumin to my carrot hummus. There are so many wonderful ways to adapt the traditional hummus recipe! To serve, place some of the warm hummus on a plate, and drizzle with olive oil and add a pinch Maldon's Sea Salt. Sprinkle with paprika and fresh parsley if desired. If the hummus has cooled down already, then reheat for 30-60 seconds in the microwave, stir, and add toppings. Adapted by Selva Wohlgemuth, from Plenty by Yotam Ottolenghi Pretty in Pink Beet Hummus Makes about 4 cups (serves 4-6) INGREDIENTS 1 cup dried Pedrosillano café garbanzo beans 1 ½ teaspoons baking soda, divided 2 medium steamed red beets, peeled and quartered ½ cup tahini paste (organic toasted) Juice of one lemon (about 3-4 tablespoons) 3 garlic cloves, coarsely chopped 1 teaspoon Real sea salt ¼ teaspoon chipotle powder (optional) Extra virgin olive oil Maldon's Sea Salt DIRECTIONS Place the chickpeas into a bowl and cover with double their volume of cold water. Add 1 teaspoon baking soda to the chickpeas. Soak the chickpeas overnight, at least 12 hours. The next day, drain and rinse. Place the soaked chickpeas and remaining ½ teaspoon baking soda in a medium saucepan and cover with double their volume of cold water. Bring to a boil, then simmer on low (very gently) for 30-45 minutes, or until soft and easy to mush. Spoon off foam during cooking. Add more water during cooking if necessary to keep them immersed. Strain chickpeas when done. Transfer the warm chickpeas to a food processor and add the beets, tahini, lemon juice, garlic, sea salt and optional chipotle powder. Process for 1-2 minutes, or until totally smooth. You want the mixture to be very soft and smooth. Taste and add more salt if you like. Keep warm. To serve, place some of the warm hummus on a plate, and drizzle with olive oil. Sprinkle with Maldon's sea salt. Note: For how to instructions on steaming beets check out this recipe for steamed beet salad. Are you a hummus fan too? What is your favorite version hummus? Share below!
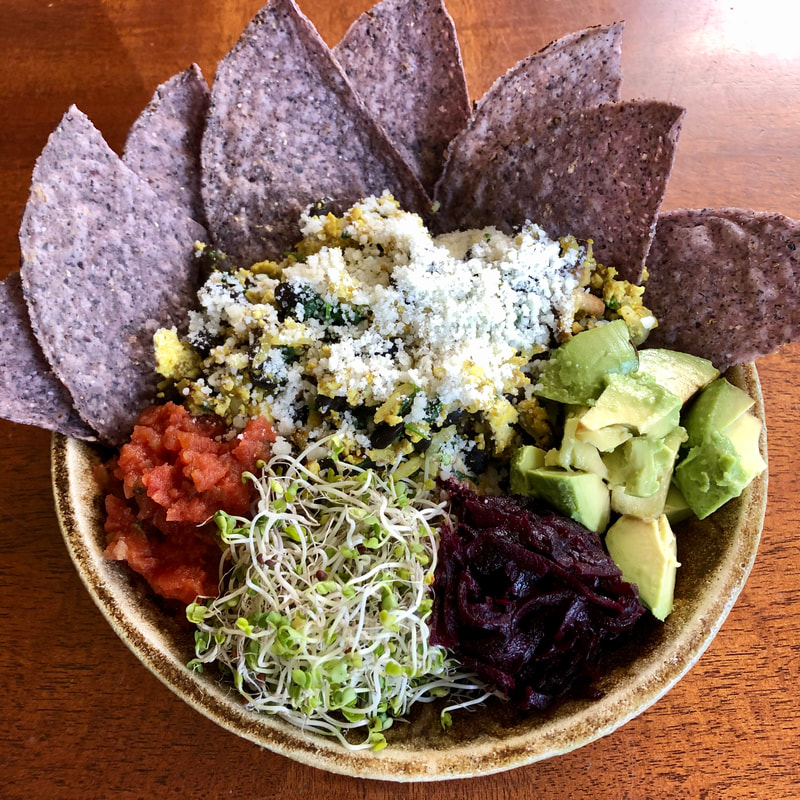
Eat Happy, Selva I craved this meal EVERY day the last seven days. The colors, the flavors, and the ease made it my go-to lately. It is satisfying, filling, and rich in gut friendly fiber and polyphenols. Plus, it is easily adaptable to what you have around, another huge benefit to this meal. In general, I aim to have one plant-based meal per day, and this has been one of my favorites. If you don't usually eat beans daily, then I suggest gradually incorporating more beans into your diet. If you go from null to WHAM, then you may have some tummy discomfort. For most people, 1/2 cup of beans or lentils per day is a great goal to shoot for. Not only are beans rich in prebiotic rich fibers called galactooligosaccharides, they are also a great source of plant protein. They are also an excellent source of molybdenum a nutrient that falls short if beans/legumes are omitted fro the diet and sulfur intake is high. Unfortunately, many current fad diets shun beans and legumes unnecessarily. Individuals with gut inflammation or IBS/SIBO may not tolerate beans and legumes until inflammation subsides or SIBO is treated. However, just because you cannot tolerate them now, doesn't mean you never will, nor that they are "BAD" for you. Beans and legumes can be a wonderful dietary staple, that are cheap, nutritious, and microbiome friendly. If you are on a SIBO Bi-Phasic Diet or a Low FODMAP diet, 1/2 cup canned brown lentils are often well tolerated. However, same rule applies here too. If you haven't eaten many beans or legumes, start slow! FeedME! Belly Bowl I am calling this bowl, FeedME! Not only am I fueling myself with nutritious food, but I am also feeding my good gut bacteria a wide variety of prebiotic rich plant compounds and fibers. For the veggie base, you can use whatever you have on hand. I have used chard, spinach, zoodles, etc. For the beans/legumes, I change it up with whatever is in the fridge or pantry. Lately, I have been making my own beans/lentils in the InstaPot after a 24 hour soak. It's cheaper and there is less waste. But canned and rinsed beans are just fine too. I would recommend Eden's brand if possible. If you have leftover ground meat you can use that in place of the tofu if you like. Pretty much you can use whatever you have available. Time: 10 minutes Serves 1 INGREDIENTS Extra virgin olive oil 1 - 3oz serving extra firm sprouted tofu - crumbled by hand ~1/4 teaspoon curry powder (or any spice/herb blend you like) 1/2 cup cooked beans/legumes 1/4 cup leftover cooked quinoa or rice Cilantro, basil, or parsley Veggie Base (dark leafy greens, zucchini) Salt & Pepper Corn Tortilla (crispy taco shells or chips work too) Garnishes Avocado Salsa Fermented veggies for good gut bug (lately I have used fermented beets) Broccoli Sprouts (or any kind of sprouts) Pecorino/Parmesan/Feta (or any kind of salty cheese) - can replace with dukkah if dairy free. DIRECTIONS Over medium-low, heat a small pan and add a little splash of olive oil. Once hot add a serving of crumbled tofu (I simply break it up in my hands until it's in small "ground" pieces). Season with your choice of spice blend (I typically use curry powder), salt and pepper. Sauté the tofu for 1-2 minutes, then add the beans, leftover cooked grain, and fresh herbs if desired. Stir until combined, season with salt and pepper, and cook for another 1-2 minutes or until heated through. Meanwhile, heat another small pan (I use cast iron) over medium low and add a little splash olive oil. Once hot add a corn tortilla and cook two minutes, then flip sprinkle with salt, and cook another minute or two or until the tortilla is crispy and little bubbles form. Once done, roll the corn tortilla up and let rest in the warm pan on the outer flap to seal in a cylinder if desired. Alternatively, you can bake corn tortilla shells in the oven per package instructions, or serve with a handful of chips. In a bowl add a handful of your veggie base (whatever you want), heat briefly in the microwave for 60 seconds until wilted ( or leave raw if desired), and drizzle with olive oil. Then top with your tofu/bean mixture. Add your favorite sides and sprinkle with salty cheese. Serve with a crispy corn tortilla and dig in!! Are you craving this belly bowl too?? Let me know what you and your belly bugs think :)
Eat Happy, Selva |
RecipesI hope you enjoy my creative, flavorful, and nutrient dense approach to whole foods cooking. All recipes are gluten free. Archives
December 2022
Categories
All
|

 RSS Feed

