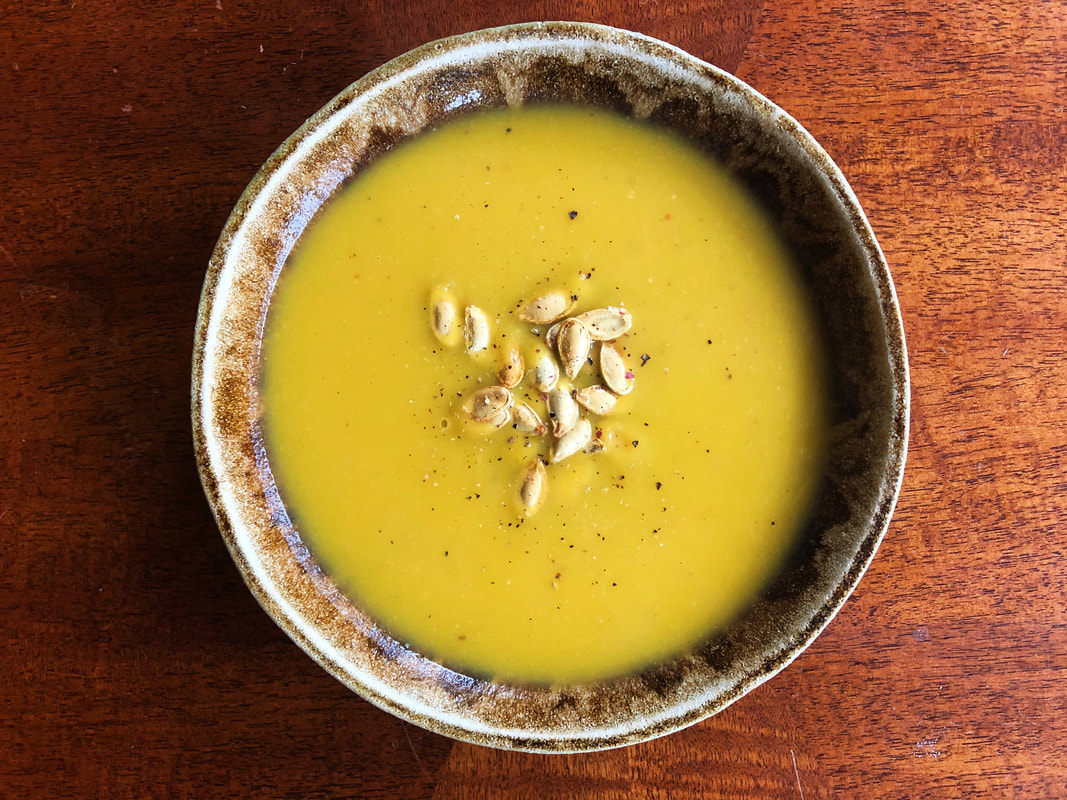
 It’s pouring sideways rain here in Bellingham, the perfect weather for a light pumpkin soup. I have been yearning for the Fall and all the bits of cozy that comes with it. Although I love salads, soups are a wonderful way to eat your veggies while also supporting digestion. Raw veggies are one of the hardest foods to digest, especially if you are not taking the time to chew them well. Therefore, soups can be an excellent meal for anyone struggling to optimally digest their foods. Soups are much easier for the stomach to breakdown because the ingredients are soft and tender. This is especially true if you make a pureed soup like this pumpkin soup. Usually, the stomach churns our food with stomach acid to make a liquidy soup called chyme. However, when the food is already pureed, the stomach has little work to do. Therefore, soups are a wonderful meal for anyone who has increased healing needs or has digestive concerns because the nutrients are much easier absorbed. For this recipe I used a pie pumpkin (or otherwise known as sugar pie pumpkin), but you can choose whatever winter squash you have on hand. I also used homemade bone broth, rich in flavor and nutrition. I do not skim the fat because the fat provides flavor and increases the absorption of the beta-carotene in the pumpkin flesh. If you are using store bought bone broth (Bonafide is a great option) it is fat free, and therefore I would suggest adding organic heavy cream or full fat coconut milk to your liking.
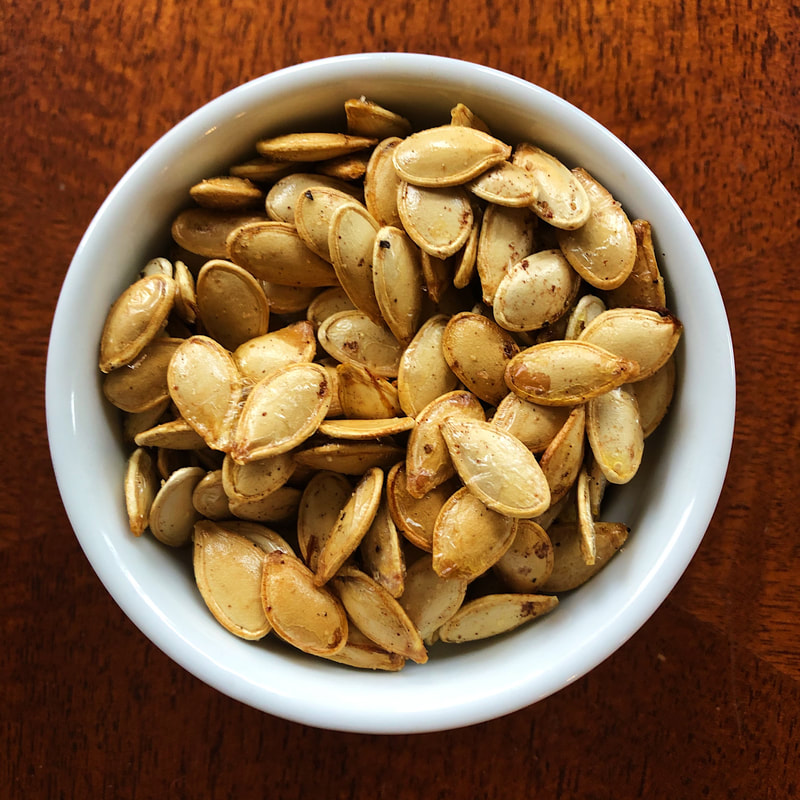
Bone broth is an excellent choice to increase the protein content of otherwise a low protein meal. Rich in collagen, bone broth helps support the healing and repair of connective tissues (think, gut lining, bone, tendons, hair, skin, nails). Along with ample amounts of prebiotic fiber rich onions and garlic this pureed soup also supports the growth of good gut bacteria. If you want, you can even roast the pumpkin seeds for little salty and nutritious snack. Simply preheat the oven to 400 degrees, rinse the seeds under water to remove excess pumpkin fibers, and lay on a parchment lined baking sheet. Spray with extra virgin olive oil, and season with salt, pepper, and your choice of spices. Roast for 12-15 minutes or until golden brown and crispy. Voila, now you have a nourishing soup and a tasty snack! Simple Gingered Pumpkin Soup Serves 4 INGREDIENTS 1 small pie pumpkin (got mine at TJs) 1 large yellow onion 3-4 cloves garlic 3 inches ginger root 1 tablespoon olive oil 3 cups homemade bone broth (see note above if using store bought) 2-3 T honey 2 T apple cider vinegar 3/4 tsp sea salt (adjust as needed) Fresh ground pepper Pinch chili flakes DIRECTIONS Quarter the pumpkin, scoop out seeds (roast if desired), and place into a pot filled with some water and a steamer basket. Steam, covered, over medium heat for about 15-20min or until tender. Meanwhile, peel and chop the onion, garlic, and ginger. In a soup pot add a glug of extra virgin olive oil and sauté the chopped veggies over medium low until glassy and tender, about 10 minutes. Add the steamed pumpkin flesh (leave skin behind), and add the bone broth. Cover and cook over medium low for another 10 minutes. Once ready, using an immersion blender, puree the soup to your liking. Season with honey, vinegar, salt, pepper, and chili flakes. Adjust seasonings to your liking. Note: If you want to keep the recipe vegetarian, simply use vegetable broth (may need to adjust salt down because most store bought vegetable broths are pre-salted), and add coconut milk or heavy cream for creaminess and flavor. Happy Fall,
Selva
0 Comments
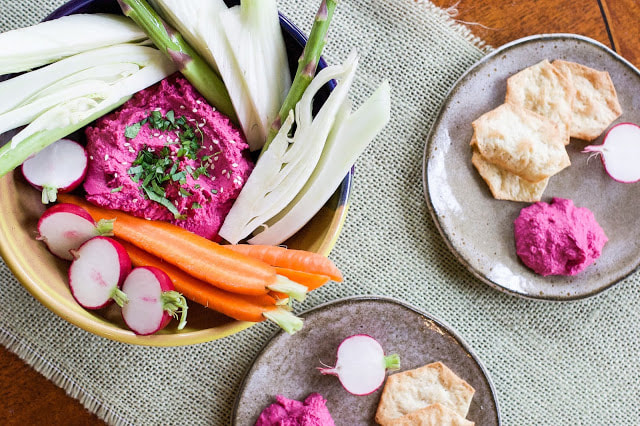 Hello my friends! Say hello to Summer weather! After such a grueling long winter, with months of clouds and rain, we now have the blue skies we have been longing for. To celebrate this wonderful change in seasons I have two super tasty recipes to share with you today. One was inspired by my favorite restaurant in town, the Temple Bar. I have never really eaten hummus as a meal. But after having such a wonderful experience, I am now a hummus advocate, especially in the summer. No longer is hummus just a spread or a dip for an easy snack, but it can easily become a hearty and satisfying meal...just make the portion size larger! Plus once you try the recipes below...you will never want to go back to store bought hummus...honestly. These recipes are creamy, super tasty, and budget friendly. A win-win situation. Secrets on How To Make The Perfect Hummus First of all the big difference is I start with dry chickpeas. If you want a creamy, smooth, and delicate hummus, you have to start from scratch. Trust me, the little extra forethought is worth it! Otherwise you will get chunky, thick, and gritty hummus. Secondly, you must choose Pedrosillano Cafe Garbanzo Beans. These smaller versions of your traditional chickpea, are the choice for hummus makers because they are creamier in consistency and have a nuttier flavor. Luckily you do not have to look far. If you live in Bellingham, you can find these in the BULK section of the Bellingham Food Co-op. For the rest of you, if you can't find them at your local health food store, I encourage you to purchase them online. Thirdly, especially for the traditional hummus, try serving it warm. Yes, warm! Of course you can still eat it cold, but warming up the hummus increases the aroma and tastes much more satisfying and satiating than cold hummus. At least...in my opinion. Versatility of Hummus Many people enjoy hummus with vegetables and crackers like shown above. However, you can serve hummus as a base, topped with grilled or baked fish. You can even top it with some lamb or grass-fed beef. Also, you can layer hummus like a "bean dip". Simply put a layer of hummus in a dish, top with finely diced cucumber, bell peppers, or tomatoes, and fresh herbs, drizzle with olive oil and sprinkle with salt. This is great for easy dipping! Of course you can also use it as a spread on sandwiches and wraps. However, I just love the simplicity of serving it alone with fresh seasonal veggies (raw, steamed, or roasted), especially in the summer. Now get soaking! Whether you make the beet or traditional version, you will love it!  Traditional Middle Eastern Hummus Hummus made from scratch is easy, cheap, and the quality is far better than what you can find at the grocery store. I personally love to make a batch of traditional hummus, scoop out half from the processor, and then add additional spices or veggies for some extra FLAVOR and FUN. Then I have two flavors in one single batch. Alternatively, you can make a whole batch of beet hummus if you want (recipe below). Also, hummus freezes wonderfully! If this batch is too much hummus, put half in the freezer for another warm Summer day. Makes about 3 cups (serves 4-6) INGREDIENTS 1 cup dried Pedrosillano café garbanzo beans (smaller chickpeas) 1 1/2 teaspoons baking soda, divided 1/2 cup tahini paste (organic toasted) Juice of one large lemon (~3-4 tablespoons) 3 garlic cloves, coarsely chopped 1 teaspoon Real sea salt Extra virgin olive oil Maldon's Salt (optional, but almost necessary in my opinion) Other Add In's If Desired Fresh Herbs (oregano, thyme, rosemary, etc) Spices (chipotle, cumin, curry, etc) Steamed or roasted beets or carrots Additional Toppings Smoked paprika (optional) Roughly chopped parsley (optional) DIRECTIONS Place the chickpeas into a bowl and cover with double their volume of cold water. Add 1 teaspoon baking soda to the chickpeas. Soak the chickpeas overnight, at least 12 hours. The next day, drain and rinse. Place the soaked chickpeas and remaining ½ teaspoon baking soda in a medium saucepan and cover with double their volume of cold water. Bring to a boil, then simmer on low for 30-45 minutes, or until soft and easy to mush. Spoon off foam during cooking. Add more water during cooking if necessary to keep them immersed. Strain the chickpeas and retain a little of the liquid. Alternatively, you can cook the chickpeas in the InstantPot on high pressure for 8 minutes. Then let the pressure naturally release for ~10 minutes, then release the vent manually. Transfer the warm chickpeas to a food processor, add the tahini, 1/4 cup lemon juice, garlic, and sea salt. Process for 1-2 minutes, or until totally smooth. Add some of the cooking liquid if additional liquid is needed and process again. You want the mixture to be very soft and smooth. Taste and add more salt if you like. Keep warm. At this point if you want to make a half/half batch, transfer half of the traditional hummus into a glass container. Then add 1-2 steamed medium beets for a beet hummus, some roasted carrots for carrot hummus, or 1-2 tablespoons chopped fresh herbs (like oregano, thyme, rosemary, etc) to the processor and blend until smooth. Sometimes I like to add some chipotle powder or smoked paprika to my beet hummus or some cumin to my carrot hummus. There are so many wonderful ways to adapt the traditional hummus recipe! To serve, place some of the warm hummus on a plate, and drizzle with olive oil and add a pinch Maldon's Sea Salt. Sprinkle with paprika and fresh parsley if desired. If the hummus has cooled down already, then reheat for 30-60 seconds in the microwave, stir, and add toppings. Adapted by Selva Wohlgemuth, from Plenty by Yotam Ottolenghi Pretty in Pink Beet Hummus Makes about 4 cups (serves 4-6) INGREDIENTS 1 cup dried Pedrosillano café garbanzo beans 1 ½ teaspoons baking soda, divided 2 medium steamed red beets, peeled and quartered ½ cup tahini paste (organic toasted) Juice of one lemon (about 3-4 tablespoons) 3 garlic cloves, coarsely chopped 1 teaspoon Real sea salt ¼ teaspoon chipotle powder (optional) Extra virgin olive oil Maldon's Sea Salt DIRECTIONS Place the chickpeas into a bowl and cover with double their volume of cold water. Add 1 teaspoon baking soda to the chickpeas. Soak the chickpeas overnight, at least 12 hours. The next day, drain and rinse. Place the soaked chickpeas and remaining ½ teaspoon baking soda in a medium saucepan and cover with double their volume of cold water. Bring to a boil, then simmer on low (very gently) for 30-45 minutes, or until soft and easy to mush. Spoon off foam during cooking. Add more water during cooking if necessary to keep them immersed. Strain chickpeas when done. Transfer the warm chickpeas to a food processor and add the beets, tahini, lemon juice, garlic, sea salt and optional chipotle powder. Process for 1-2 minutes, or until totally smooth. You want the mixture to be very soft and smooth. Taste and add more salt if you like. Keep warm. To serve, place some of the warm hummus on a plate, and drizzle with olive oil. Sprinkle with Maldon's sea salt. Note: For how to instructions on steaming beets check out this recipe for steamed beet salad. Are you a hummus fan too? What is your favorite version hummus? Share below!
Eat Happy, Selva 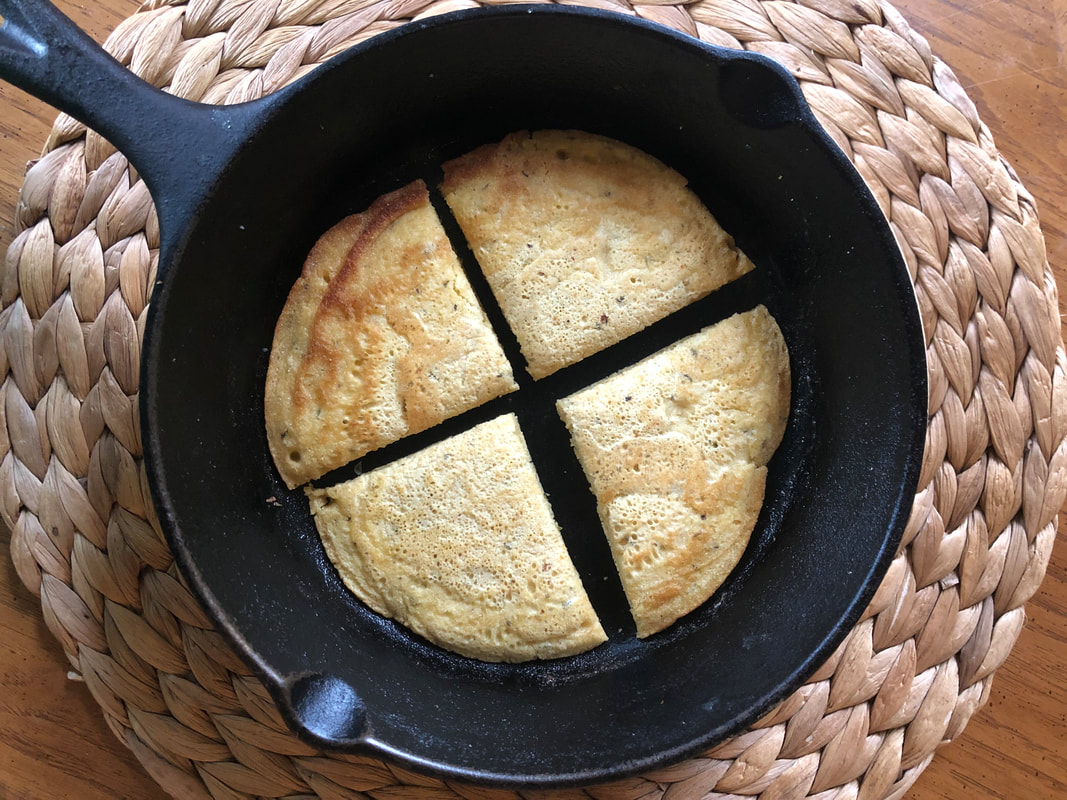 Chickpea flatbread is something super satisfying and comes together super quick and easy. Although very similar to farinata (or socca), it has one very important additional ingredient, baking powder. This addition gives the flatbread, a lighter more bread like texture. You can serve this flatbread as a gluten-free bread alternative without the added refined starches and binders often used in gluten-free baking. Plus the garbanzo bean flour is really cheap and great if you are watching your food budget. So here you go! This is one of my favorite hacks for a bread alternative, that is lower in carbohydrates (18g), high in protein (7g), and high in fiber (8g). The Maldon's sea salt flakes, definitely takes it up a notch and is not required....BUT I personally think it's a necessary garnish for the full flatbread experience.
Chickpea Skillet Flatbread Makes 1 Serving INGREDIENTS 1/4 cup garbanzo bean flour 1/4 teaspoon baking powder Generous pinch salt Fresh ground pepper Herbs to taste (I like oregano and rosemary) 1/4 cup water Butter (or olive oil) Maldon's Sea Salt Flakes DIRECTIONS In a small bowl mix together the garbanzo bean flour, baking powder, salt, pepper, and herbs until incorporated. Then add 1/4 cup water and mix with a spoon until most lumps are gone (doesn't have to be perfectly smooth). Meanwhile, heat a small cast iron skillet over medium. Once hot reduce to medium low and add a generous pat of butter, evenly coat the bottom, and pour in your garbanzo bean mixture. Tilt the pan to evenly distribute the mixture across the bottom. Sprinkle with Maldon's salt and cook until set about 3-5 minutes. Using a large spatula flip the "pancake" over, all the while carefully slipping in another pat of butter. Then cook another minute. Voila! You are done! Cut up the flatbread into quarters, and enjoy as part of your meal. I like it with soup, as a side to a salad, or simply topped with tomato slices and avocado. Note: Instead of making 1 larger "pancake", you can also make a few smaller ones. It's up to you! Let me know how you enjoy this chickpea flatbread at home! |
RecipesI hope you enjoy my creative, flavorful, and nutrient dense approach to whole foods cooking. All recipes are gluten free. Archives
December 2022
Categories
All
|

 RSS Feed

|

|
Providing custom functional nutrition therapy since 2015.
Follow HBN on Social Media!
©Happy Belly Nutrition, LLC 2015-2023