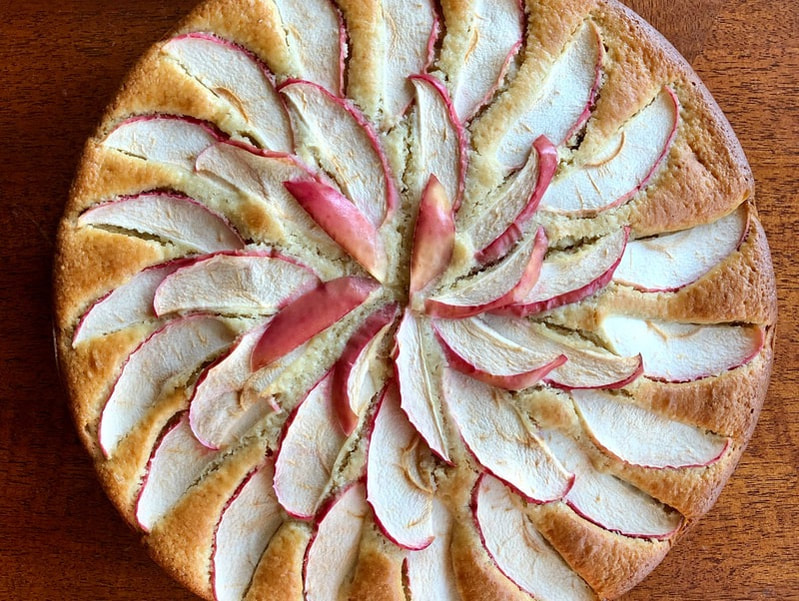
 October. The month of foggy mornings and bluebird afternoons, brilliant yellows and orange, and home baked goods with seasonal fruit. I don't bake as often as I used to. But being German I love apple cakes, much more than apple pie. So I decided to use delicious apples to make an Apple Lemon Cake. I wanted to use oats as part of my recipe instead of just premade gluten free flour mixes. The oats give the cake more moisture, more fiber, and more nutrition. I also LOVE lemon. Therefore, I added plenty of lemon juice and lemon zest. If you want it even zestier, taste test the batter before adding the baking powder and see if you want even more. Sometimes I even add a teaspoon of rum extract, if I am feeling extra groovy. Although, I typically stick with gold ol’ fashioned butter, you are welcome to replace the butter with olive oil or coconut oil. The flavor profile will change, but it will still be tasty. Keep in mind that my recipe calls for salted butter, so make sure to increase the sea salt by ¼ teaspoon if your opting for the dairy free version. The big beauty of this cake is how quickly and easily it comes together. Add all the ingredients to a high speed blender, top with apple slices, and put her in the oven! No beaters, multiple bowls, etc needed here. A good microplaner and grater will come in handy however. If you don't have apples on hand, pears work well too.
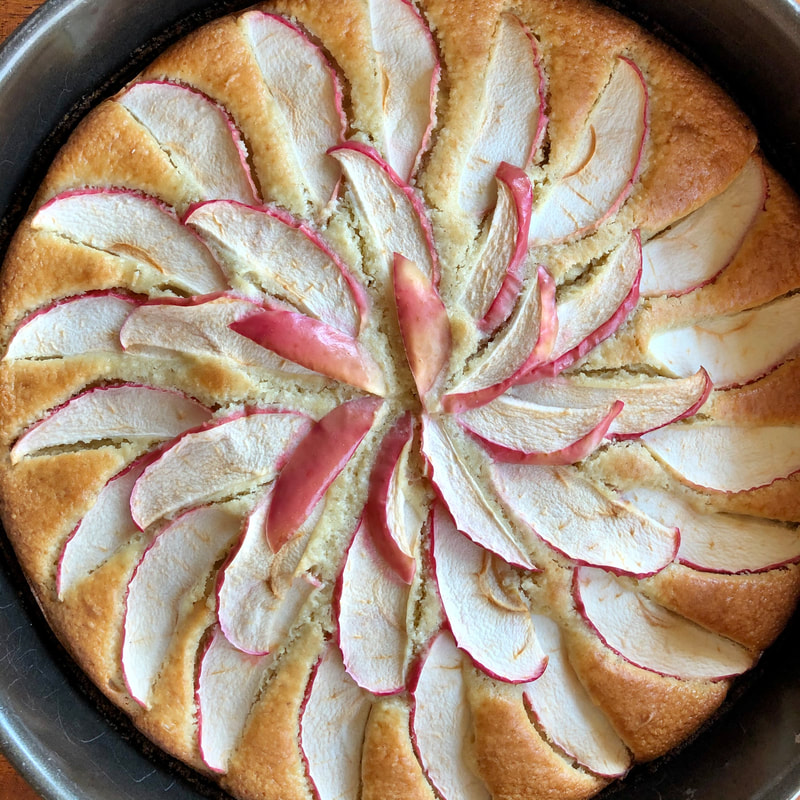
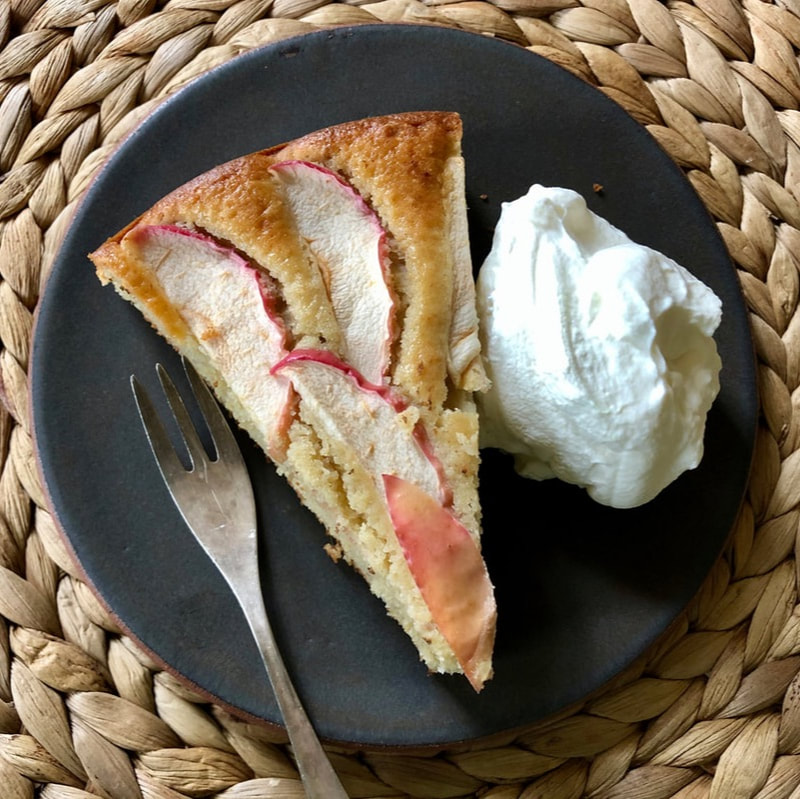
So if you want aromas of apple, vanilla, and lemon wafting through your house, then by all means, try this delicious, lighty sweet, German apple cake. And please, top it with HOMEMADE whipped cream. It’s worth the extra effort. Apple Lemon Cake Serves 12 INGREDIENTS 2 large apples ¾ cup sugar 3 large eggs 1 stick salted butter, melted ¼ cup milk (any kind) Zest and juice of 1 ½ lemons 1 ½ teaspoons vanilla extract ½ teaspoon sea salt 1 cup rolled oats 1 cup Bob’s 1:1 all-purpose gluten free flour 4 teaspoons Rumsford baking powder DIRECTION Preheat oven to 350 degrees. Butter the bottom and sides of an 11” springform cake pan. Meanwhile, grab a small bowl and pour the sugar into it. Top it with the lemon zest and rub the zest into the sugar. This helps release the essential oils. Set aside for now. Grate 1 large apple (I used Honeycrisp) leaving peel on (measuring ~ 1 cup of grated apple). It will leave behind a lot of juice, save this. Now core and slice the second apple into thin slices, and drizzle with a squeeze of lemon to keep from browning. You will be using these slices to evenly fan out on top of the cake. Set aside. In a high speed blender (like BlendTec or Vitamix), add the grated apple and all its juice, lemon zest infused sugar, eggs, melted butter, milk, juice of 1 ½ lemons, vanilla extract, and salt. Blend until smooth, about 30 seconds. Then add the rolled oats. Blend on low for about 60 seconds. Finally, add the gluten free all-purpose flour, and blend another 15 seconds. Once the mixture is smooth, sprinkle in 1 teaspoon of baking powder in at a time through a fine mesh sieve (or loose leaf tea strainer), and pulse until incorporated. Repeat until all the baking powder is gone. Evenly pour the mixture into the buttered baking pan, and top with apple slices, fanning in three layers. Place into oven and bake for 60-65 minutes or until inserted toothpick comes out clean. Serve with homemade whipped cream. Notes: You can easily replace the butter with ½ cup olive oil or melted coconut oil if you want to keep this recipe dairy free. Simply increase the sea salt from ½ to ¾ teaspoons. Apples can be replaced with pears as well. Happy Baking!
Selva
2 Comments
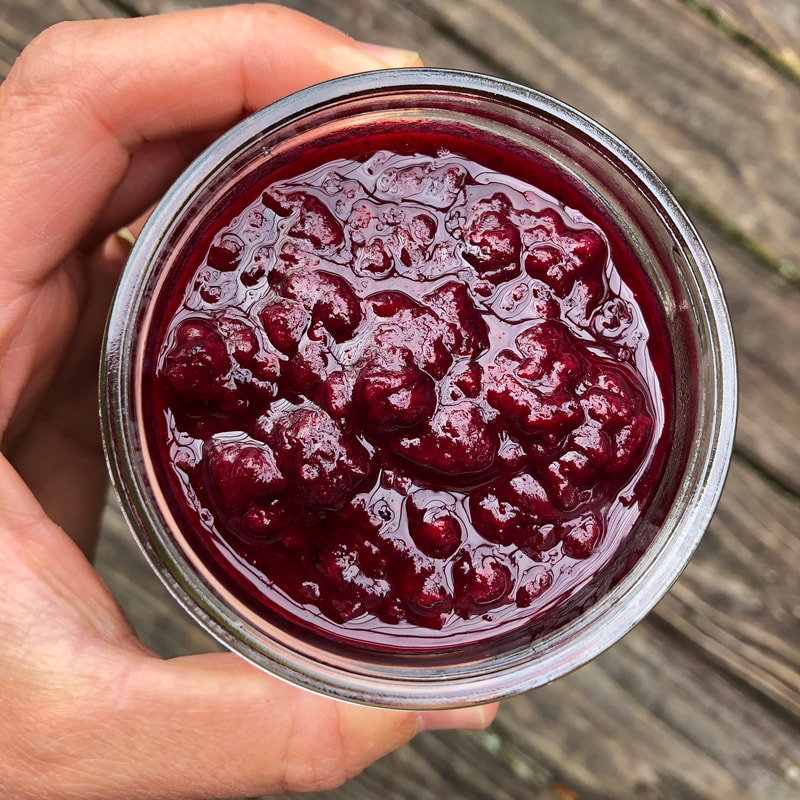
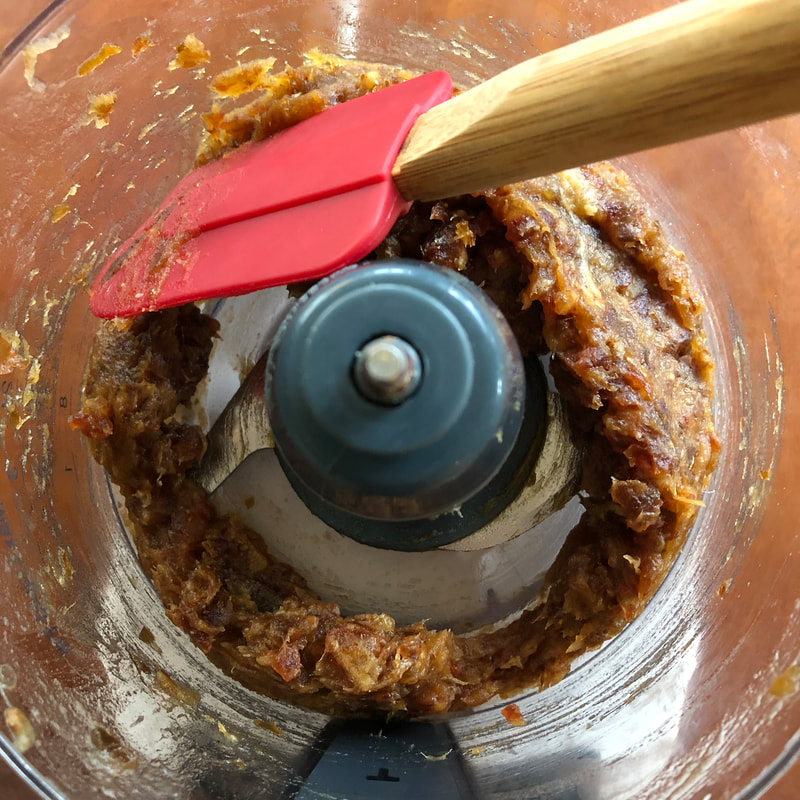
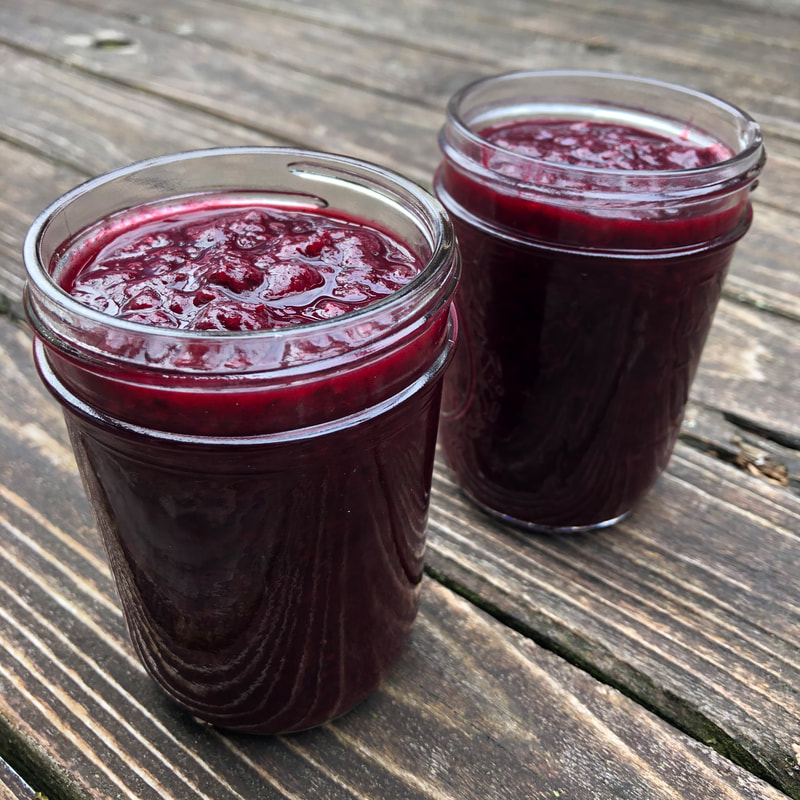
I love blackberries. Maybe it is because they bring me back to my childhood memories, picking buckets upon buckets along the Skagit River, to make a years supply of blackberry jam. My father always recruited my brother, my mom, and I to help him pick. The more, the better. The following days would be spent making jam, wafting the aroma of blackberries and lemon throughout the house. We always made so much that the surplus became holiday gifts for friends. It was a time when all four of us were together, happy and healthy. Now in my mid thirties I am reliving this memory. Earlier this week Toren and I went to pick our own bucket full at the abundant neighborhood blackberry bushes down the street. Within a quarter hour, I had picked plenty for a little batch of jam, and extra for snacking. The hot rays of the sun had transformed the little firm green berries into plump, sweet, and juicy bits of dark purple goodness. They were delicious. Inspired by a glass of good red wine, I got into production mode. How could I make a delicious, unique and healthy jam with these perfectly ripened blackberries? Well, instead of sugar I decided to use dates. They not only sweeten, but also carry along fiber which helps thicken the jam, vitamins and minerals. A generous swig of red wine, and a squeeze of lemon juice also brighten the flavor.
Making homemade jam is great way to preserve these delicious berries and have access to them year round. Blackberries are EVERYWHERE FOR FREE right now, so don't spend your money on bland store bought alternatives. Just make sure to pick berries aways from high traffic zones, and to rinse them thoroughly prior to use. You can even freeze them for later. Plus, you have full control of what you use to sweeten the jam. Besides using it on buttered toast, you can stir some into plain yogurt, into oatmeal, or even add a dollop to vanilla ice cream. I hope you like this lightly sweet jam that tastes of high summer.
Blackberry and Red Wine Jam Makes Four 8oz mason jars INGREDIENTS 6 cups rinsed blackberries 12 medjool dates, pitted and soaked with hot water for 10 minutes 1/2 cup red wine (I used cabernet sauvignon) juice of 1/2 lemon DIRECTIONS Put blackberries and red wine into a large saucepan and heat until boiling. Reduce heat to a steady simmer. With a large spoon or fork crush the blackberries against the side of the pot. Stir often and allow the berries to break down completely and the liquid to reduce. This takes about 20 minutes. Meanwhile, place dates into a food processor, and discard the soaking water. Process until a smooth paste is formed. Add the date paste and lemon juice to the blackberry and wine mixture and stir well. Allow to simmer for about 5 minutes while stirring often. Do not let it burn on the bottom! Meanwhile bring a large pot with mason jars and a little water to a boil. Place a lid on top to keep steam in. This will sterilize your jars. Pour the hot jam liquid into sterilized jars and top with clean lids. Place on counter top until the lids "pop" inward. They can now be stored safely for later use. Alternatively, you can transfer the jam into jars random clean jars, allow to cool, top with lid, and then freeze. Either way is fine.
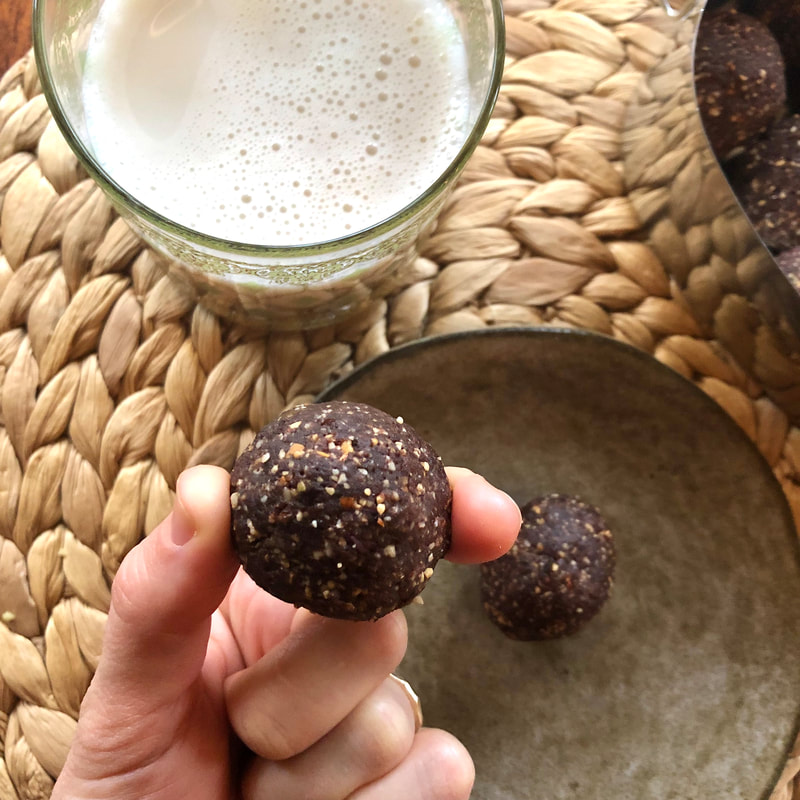
If you like chocolate and enjoy roasted nuts, then these little bites of heaven are for you. Whenever I offer one of these truffles to friends or family they always ask me, "Are you sure there is no sugar in these?". My answer is always, "Yes, it's just nuts, cacao, and dates!". I chose to use two different cacao powders. The extra dark cacao powder gives the truffles that rich dark chocolate flavor, but I didn't want it to be too rich, so I used regular cacao powder as well. Depending on your preference, or what you have at home, you can make your own personalized cacao blend. The cacao nibs give the truffles a little crunch (which I love). These truffle bites are the perfect little whole food treat that all will enjoy, trust me. You might as well make a double batch while you are at it! My favorite way to eat these truffles is to pair it along side a cold glass of unsweetened almond milk or a cup of hot green tea.
Make ~15 Truffles Time: ~ 1 hour (including 45 minute cool time) INGREDIENTS 1 heaping cup raw whole nuts (hazelnut/almonds, walnuts/pecans, cashews)* 8-9 medjool dates, pitted 1 tablespoon extra dark cacao powder (I got mine at Whole Foods) 2 tablespoons organic cacao powder (I used TJ's organic cacao powder) 1 tablespoon raw cacao nibs Generous pinch sea salt Optional: 2 scoops Healthy Origins Sunfiber DIRECTIONS Preheat oven to 350 degrees. Place nuts on baking sheet and roast for 6-8 minutes, depending on oven. Remove from oven, transfer to a plate, and allow to cool, about 15 minutes. If you are using smaller nut pieces they will roast faster. If you are using whole nuts they will roast slower. Make sure to watch your nuts carefully so that they don't burn. Once the nuts are cooled, transfer the nuts to a food processor and add the pitted dates, cacao powders, cacao nibs, and generous pinch sea salt. You can add optional Sunfiber to increase the prebiotic content of these nut balls. Sunfiber is partially hydrolyzed guar gum, a safe low FODMAP fiber that has been shown to increase the growth of good gut bacteria and help modulate bowel movements positively. Also, Sunfiber is naturally sweet, adding a little bit of sweetness to this treat. Process until the mixture sticks together when pressed between fingers, about 1 minute. Roll into even balls and store in an airtight container. Store in fridge or freezer. They are softer when stored in fridge and a bit firmer when frozen (my personal favorite). *My favorite nut combo is a blend of walnuts, hazelnuts, and cashews. |
RecipesI hope you enjoy my creative, flavorful, and nutrient dense approach to whole foods cooking. All recipes are gluten free. Archives
December 2022
Categories
All
|


 RSS Feed

|

|
Providing custom functional nutrition therapy since 2015.
Follow HBN on Social Media!
©Happy Belly Nutrition, LLC 2015-2023