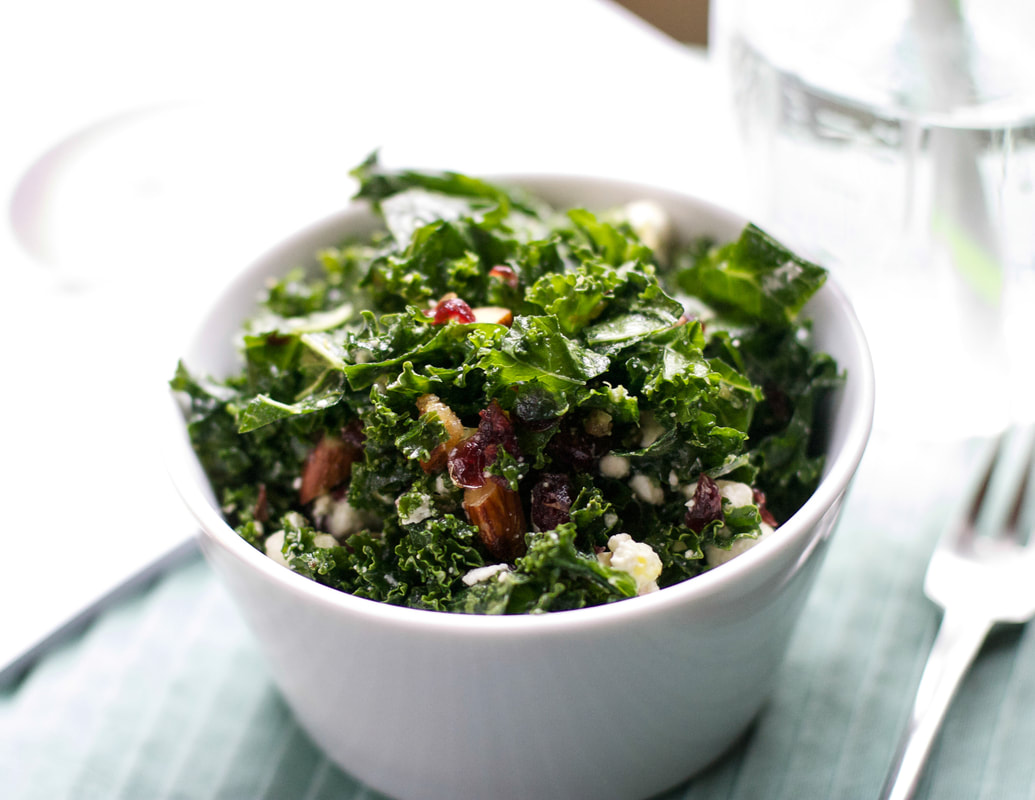
 Kale salads are often less than desirable. IMO. The kale leaves are either left too big and floppy, or it feels like you are a horse, chewing, and chewing, and chewing. Am I right? Well, welcome the massaged kale salad! By simply massaging kale leaves with sea salt, the friction gently breaks down the fibers, leaving the leaves more tender and easier to digest. Massaging also enhances the flavor of the kale, especially when tossed with a bunch of delicious goodies. Cooked cruciferous vegetables are often better tolerated as the heat breaks down fibers. Massaging the greens has a similar effect, while keeping intact heat sensitive nutrients. Unfortunately, I know a lot of people struggle with gas and bloating after eating raw cruciferous vegetables (kale, broccoli, cauliflower, cabbage, Brussel sprouts, etc). This is likely due to their high amounts of raffinose, a short chain carbohydrate that humans cannot digest, leaving a feast for gut bacteria. Cauliflower and Brussel sprouts are considered high FODMAP foods, and are often triggers for patients with IBS. Also, sometimes individuals do not tolerate cruciferous vegetables due to an abundance of sulfur reducing bacteria in the gut that like to feed off of their sulfur rich compounds. If you have struggled with severe foul smelling gas and bloating after eating cruciferous vegetables (or garlic and onion), you may want to consider hydrogen sulfide SIBO (small intestinal bacterial overgrowth) or LIBO (large intestinal bacterial overgrowth). However, if you tolerate cruciferous vegetables just fine, then they are a great addition to support liver detoxification and hormone health. Eating one serving of cruciferous vegetables per day, is a great dietary practice for overall health and wellness. Festive Massaged Kale Salad INGREDIENTS 1 bunch green curly kale (~8 leaves) 1/4 teaspoon sea salt 1 ½ tablespoons unrefined cold-press extra virgin olive oil 1 ½ tablespoons balsamic vinegar (white or brown) 1/3 cup coarsely chopped roasted maple almonds or walnuts (see below for recipe) **Crumbled gorgonzola, feta, or goat cheese **Dried cranberries, raisins, or currants, chopped Zest of 1 lemon (optional) Squeeze of fresh lemon juice Sea salt and fresh pepper to taste DIRECTIONS Wash your kale and shake off any excess water. You can also shake them in a clean kitchen towel. Devein each kale leaf by pulling down along the stem towards the tip of the leaf. Chop the leaves into bite sized pieces and toss into a large bowl. Add the sea salt and gently massage the kale for about 1 minute or until the kale leaves begin to break down and look shiny. Do not over massage otherwise it will wilt too much. Add the olive oil and the vinegar and toss well. Finally, add the chopped almonds, cheese, and dried fruit of your choice, and mix until combined. **Add as much of the cheese and dried fruit as you like. Add the lemon juice and lemon zest if desired. Season with salt and pepper to taste. Variation: You can swap the cheese with diced avocado. Roasted Maple Almonds Makes 1 cup INGREDIENTS 1 cup almonds (or walnuts/pecans) 1 tablespoons butter or ghee 1 tablespoon maple syrup Generous pinch sea salt DIRECTIONS Preheat oven to 350 degrees. Place almonds onto a baking sheet and roast for about 8 minutes or until fragrant. Make sure to watch that they do not burn. Set aside to cool. Heat a cast-iron pan over medium. Add the butter and the maple syrup. Stir the mixture until it bubbles a lot, becomes syrupy, and reduces in amount. Add cooled nuts and pinch of salt. Mix well to coat. Be careful as the syrup is extremely hot. With a spoon or spatula spread almonds onto a plate and allow to cool. Break into pieces. Serve with the massaged kale salad or eat as a snack! Are you kale lover? Let me know if the comments below!
Eat Happy, Selva
0 Comments
 Lemon Curry Four Bean Salad This refreshing take on a bean salad is a perfect addition to your summer meals. Rich in protein and fiber, it will keep you full and satisfied. Plus, the prebiotic fibers will keep your gut bugs humming with joy. Unfortunately, individuals with SIBO/IBS may NOT tolerate this recipe well due to the high prebiotic content. This bean salad keeps well, and improves in flavor the longer it sits. If you cannot tolerate onion, add in diced bell pepper or cucumber for the crunch factor. Plus, you can easily replace the clove of garlic with a tsp of finely chopped fresh oregano for spice, or simply omit. Serves 6 INGREDIENTS 1/3 cup extra virgin olive oil ¼ cup apple cider vinegar Juice and zest of 1 lemon (plus more lemon juice prior to serving) 2 tablespoons honey ¼ teaspoon yellow curry powder ¼ teaspoon sea salt, plus more to taste Fresh ground pepper ½ large onion, finely chopped 1 clove garlic, finely minced 1 ½ cups frozen green beans, thawed 1 can garbanzo beans 1 can kidney beans 1 can great northern beans Generous handful finely chopped cilantro/basil/parsley DIRECTIONS In a large bowl whisk together the olive oil, vinegar, lemon juice & zest, curry powder, sea salt, and fresh ground pepper, until the honey and salt are dissolved. Stir in the chopped onion and garlic and allow to marinate in dressing. Meanwhile, measure out about 1 ½ cup of frozen green beans and briefly thaw in microwave. Alternatively, leave out at room temp until thawed. Cut the green beans into smaller pieces using kitchen shears. Transfer to bowl. Drain and rinse the canned beans, and transfer to the bowl. Mix all the ingredients together, sprinkle in the chopped fresh herb of choice, and stir until combined. Season with additional salt and pepper to taste. When ready to serve, squeeze a little fresh lemon juice over each serving and enjoy! Eat Happy,
Selva
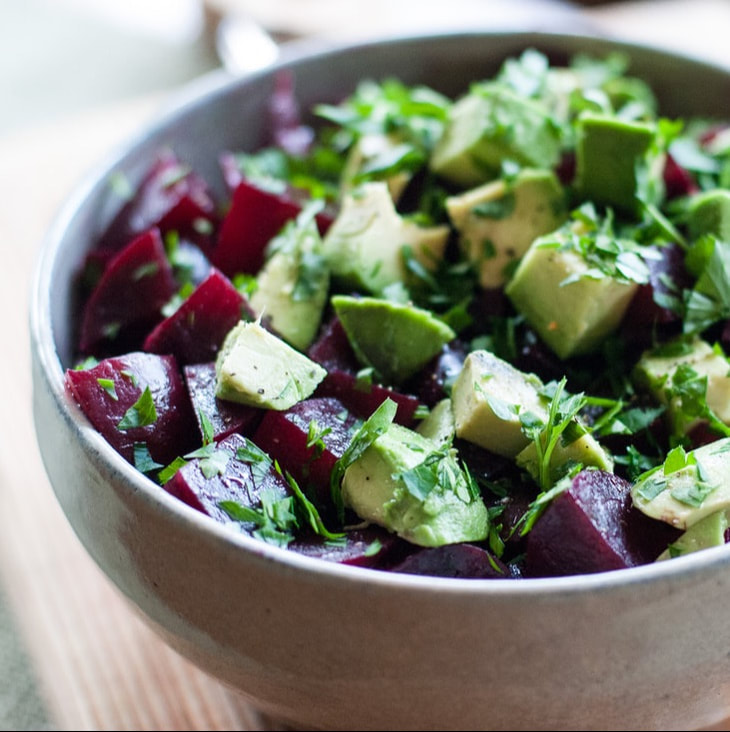
Steamed Beet & Avocado Salad
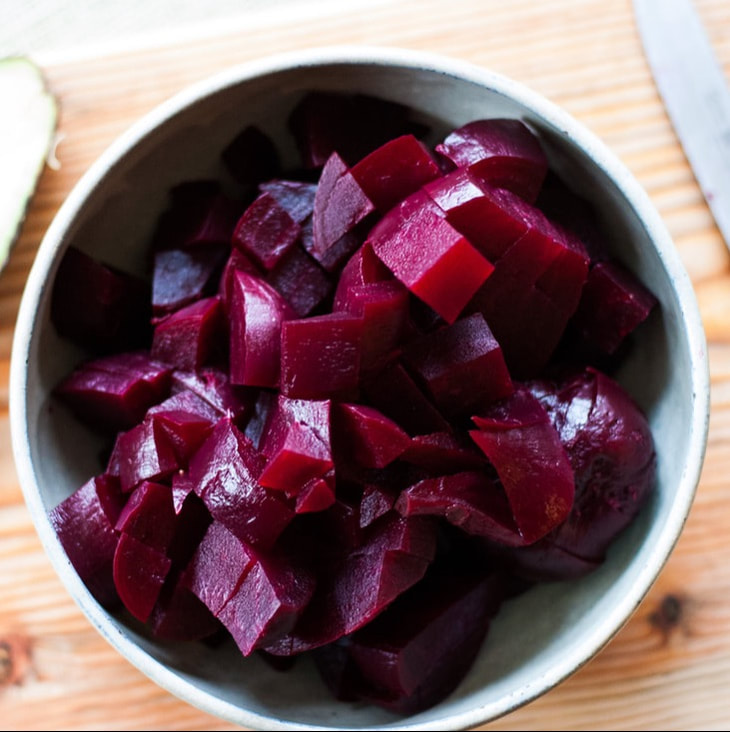
Wow family with this simple salad. One of my favorite ways to serve beets is to steam them. It keeps the delicate flavor and the nutrients of the root vegetable intact. Plus, it requires very minimal work. Paired with the vidid green of the avocados, this salad is not only super tasty, but very pleasing to the eye. Plus, a beet salad doesn't go wilt! It keeps great in the fridge, and actually get better the longer it marinates. Serves 4-6 Time: ~90 minutes (including steaming) INGREDIENTS 4-6 medium beets, greens removed 2 tablespoons extra virgin olive oil 2 tablespoons balsamic vinegar (white or brown) ½ avocado, diced Finely minced parsley Salt and pepper DIRECTIONS Place a steamer basket into a large stock pot. Fill with water until the water level is right below the steamer basket. Put the beets into the pot and cover with a lid. Bring water to a boil and reduce heat to medium. After 30 minutes check to make sure there is water left in pot, and add more if needed. You really want to make sure there is enough water so that your pot doesn’t burn! Cover and continue to steam for another 30 minutes, or more if needed until beets are tender when pierced with a fork. Remove from heat and allow the beets to cool 5-10 minutes. Then under cool running water, rub the beets to remove the outside skin. The skin should come off really easy if the beets are steamed until tender. Once the skin is removed, dice the beets into small bite sized pieces and toss into a bowl. In a small glass or bowl whisk the olive oil and vinegar together with a fork. Add 2 generous pinches sea salt, and whisk until combined. I used a 1:1 ratio (because beets love acid), but you can increase the olive oil or the vinegar based on your taste preference and total amount of beets. Sometimes I add honey if I don't have balsamic vinegar (because it is much sweeter than apple cider), and sometimes I also add a teaspoon dijon mustard for kick. Adapt the original dressing to your liking. Pour the vinaigrette over the diced beets and mix until all are nicely coated in dressing. The longer the beets sit in the dressing, the better. To serve transfer the beets into a nice bowl or onto a serving plater. Top with diced avocado, handful chopped parsley, and a sprinkle of ground pepper. |
RecipesI hope you enjoy my creative, flavorful, and nutrient dense approach to whole foods cooking. All recipes are gluten free. Archives
December 2022
Categories
All
|
 RSS Feed

|

|
Providing custom functional nutrition therapy since 2015.
Follow HBN on Social Media!
©Happy Belly Nutrition, LLC 2015-2023