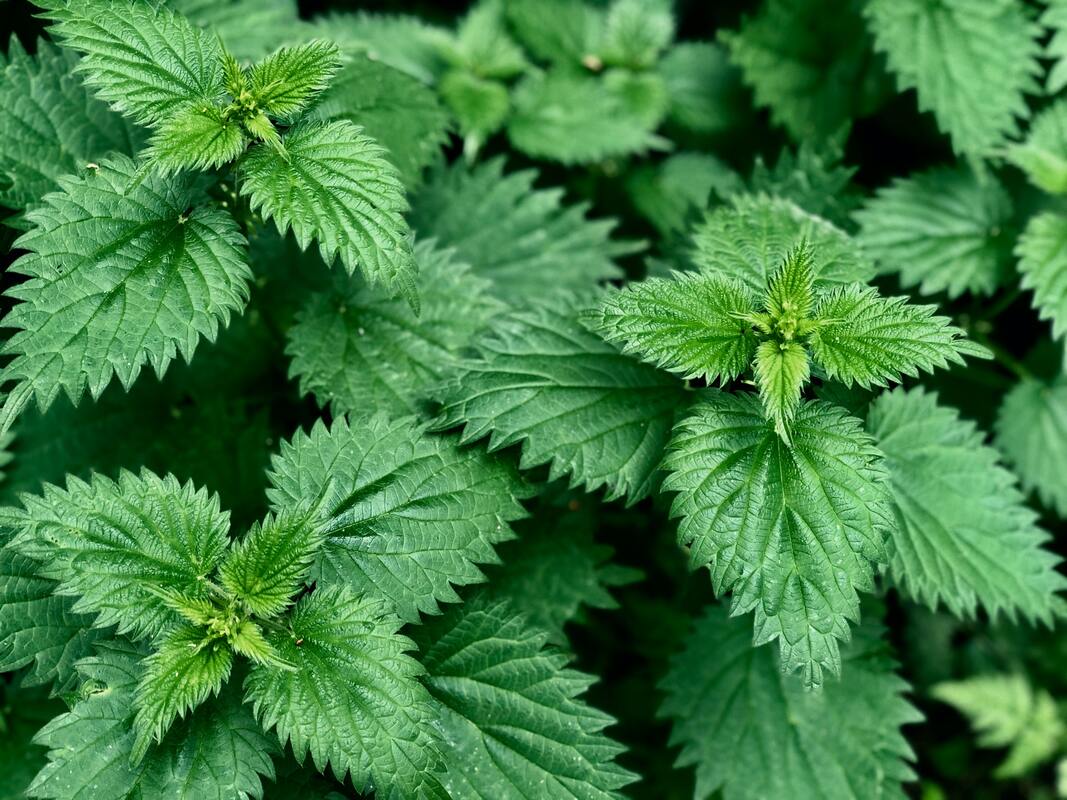
 Nettles are originally from Northern Europe but are now found all over the world. They have been used for hundreds of years as a medicinal herb for hormonal imbalances, fatigue and lethargy, forgetfulness, allergies, constipation, and detoxification support. Hildegard von Bingen, a German nun and healer who was well known during the Middle ages, spoke of nettles highly. Today, functional medicine practitioners use nettles as part of treatment plans including seasonal allergies, detoxification, blood building, and balancing hormones. Besides their medicinal background, nettles are a very nutritive plant, rich in protein, vitamin A, vitamin C, calcium, and iron. It is also a great source of polyphenols, plant compounds known to provide many health benefits, including reducing inflammation and supporting the health of our good gut bacteria. However, today I want to highlight nettles and their ability to help reduce seasonal allergies. Nature often works hand in hand. As the pollens burst into the air with the first warm spring days, nettles start to pop out along trails in the Pacific Northwest woods. Individuals struggling with seasonal allergies may find relief from the consumption or supplementation of nettles because they help inhibit the production and release of histamine from mast cells as well as their breakdown. Mast cells release histamine in response to foreign proteins, such as pollens, causing the classic symptoms of allergies including a runny nose, itchy and red eyes, and sneezing. Furthermore, nettles have been found to inhibit COX-1 and COX-2, enzymes that play key roles in the inflammation cascade. Although, clinical studies are lacking, there is one study from 1990 that found some improvement in allergy symptoms with the consumption of 600mg of freeze-dried stinging nettle powder 1-3x per day. Another more recent study in 2017, found that 150mg of stinging nettle powder taken for 1 month, significantly improved symptoms compared to standard treatment of allergic rhinitis (anti-histamines and inhaled corticosteroids). However, the placebo group also had improved symptoms post-treatment. Although at present we only have two human clinical studies, that doesn't matter. Practitioners have used nettles successfully for thousands of years. This type of experiential clinical data also counts. 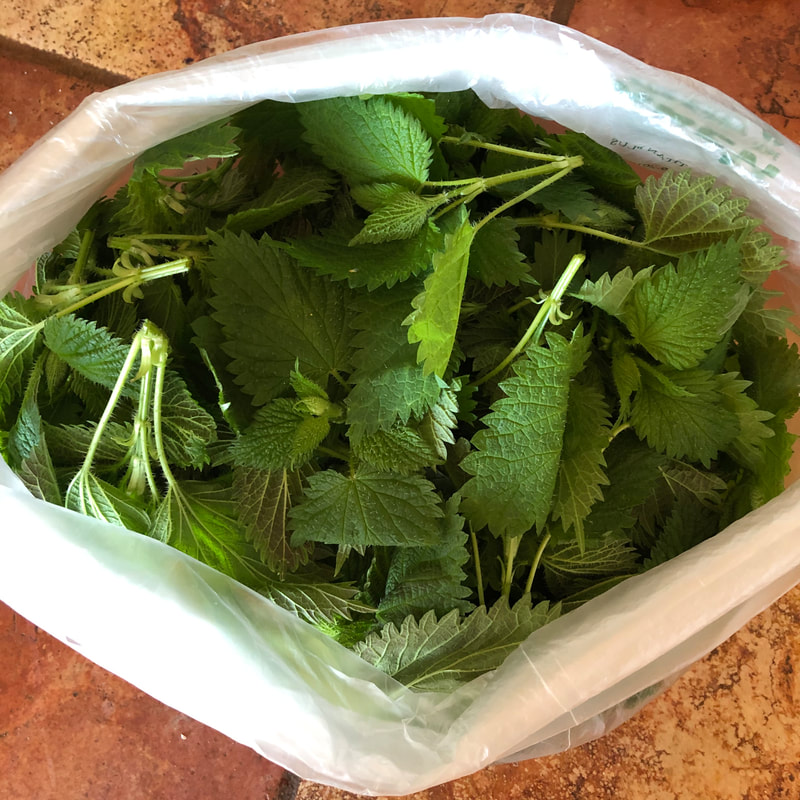 How do You Pick Nettles? You will see nettles along your local hiking trail during the months of spring and early summer. You only want to harvest the top 2-3 tiers of leaves. The younger the plant, the more delicate and tender the flavor. Using gloves and a small scissor, cut the nettle at the desired point. If you don't want to forage for them yourself, farmers markets will often sell these during the early Spring months. How Do You Use Nettles? For starters you can buy nettle tea, and drink that. It is easy and requires minimal preparation. It is earthy in flavor. However, if you want to use nettles in your meals, I recommend making either nettle pesto (recipe below), nettle potato soup (recipe below), nettle frittatas or quiches, or use nettles any way you would use spinach. Personally, I feel like nettle pesto is the most versatile. You can make 1-2 batches, and freeze what you will not use right away. Then you can add cubes of thawed nettle pesto to soups, sauces, egg dishes, pasta (of course), parchment baked chicken breast or fish, etc. The list goes on. How Do You Prepare Nettles? First wash all your foraged nettles in clean cool water. Then, in order to use nettles culinarily, you must heat or vigorously process them to remove the sting. Interestingly, once the hairs on the nettle are broken, the nettle no longer stings. I personally prefer blanching nettles. Blanching gives the nettles a brilliant green color and makes them easy to handle and trim. Blanched nettles can be frozen for use later.
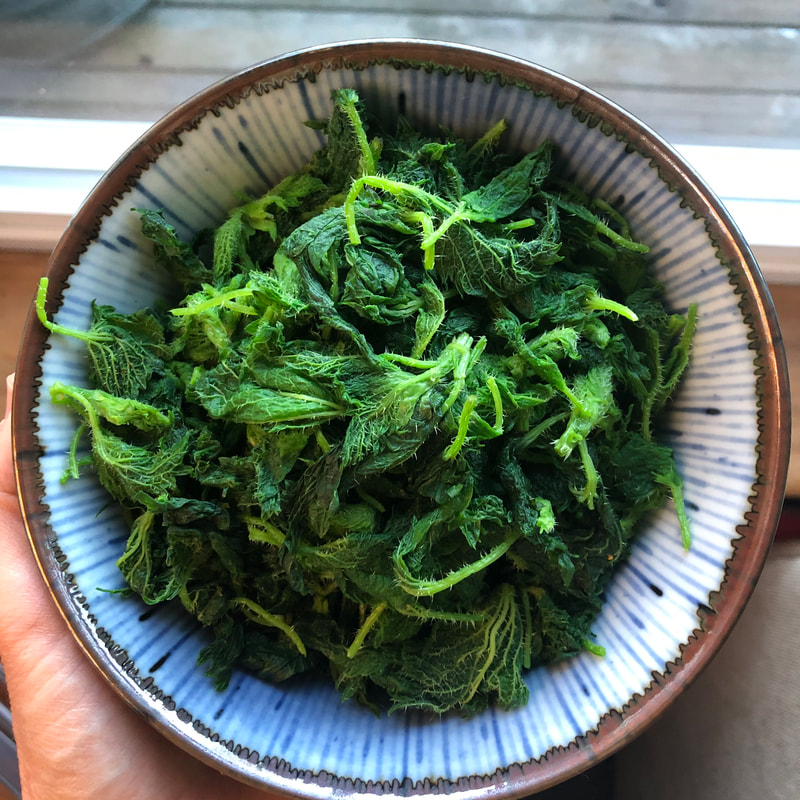
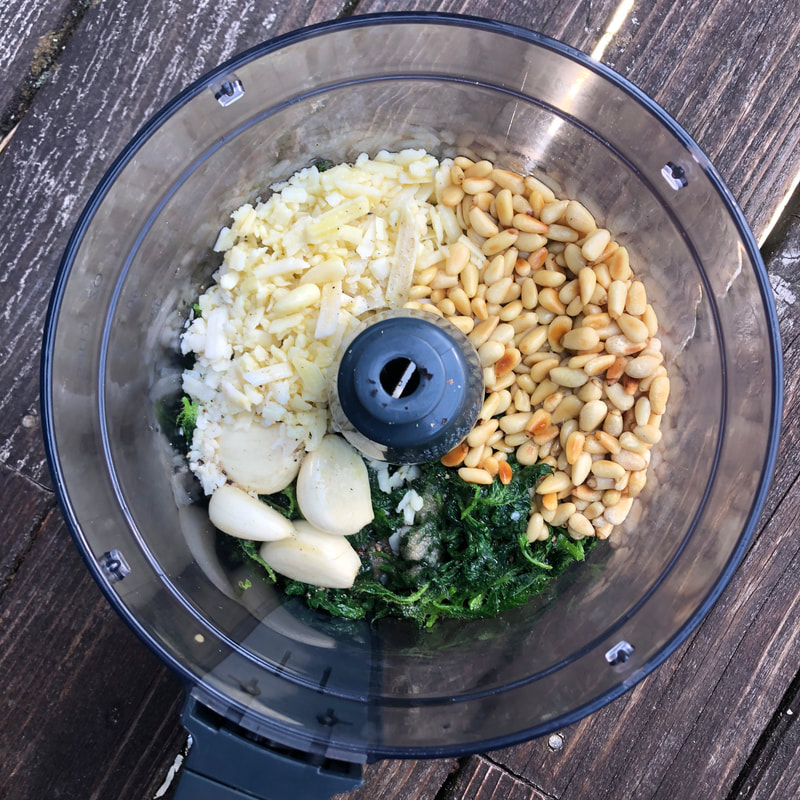
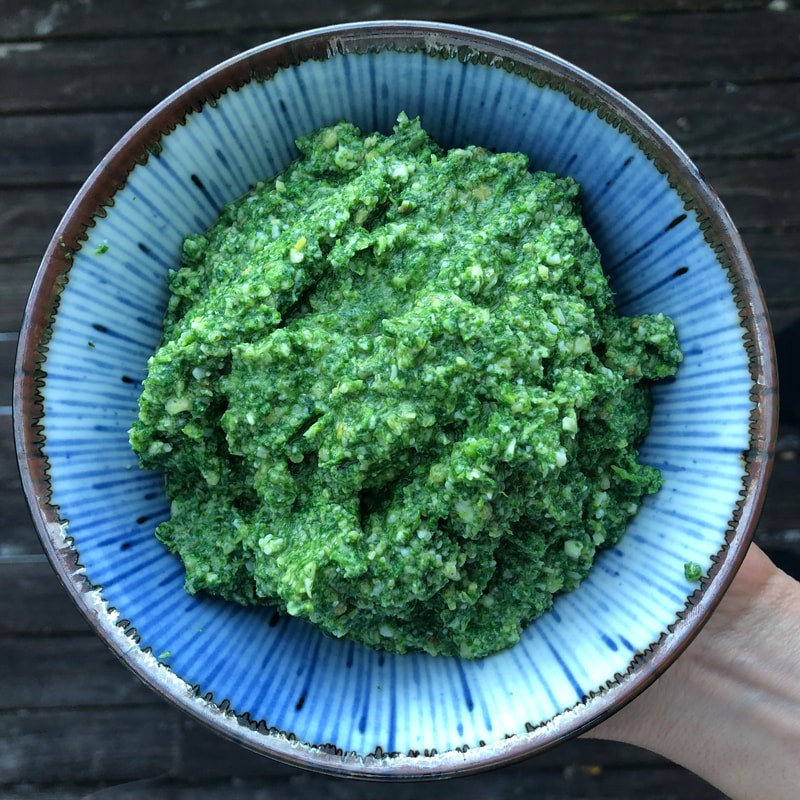
Making Your Own Nettle Pesto The nice thing about pesto is it's versatility. I suggest making two batches of this delicious pesto to freeze for year round nettle infusions. You can also add basil or other herbs to this as desired. Makes ~ 3 cups. INGREDIENTS 1 produce bag full of raw nettles (to make about 2 cups blanched and trimmed nettles) ½ cup toasted pine nuts ½ cup organic extra virgin olive oil ½ cup grated parmesan or pecorino 3-4 cloves garlic 2-3 tablespoons lemon juice Sea salt (I used ½ teaspoon) Fresh ground pepper DIRECTIONS Soak the nettles in fresh, clean water. Meanwhile, bring a large pot of salted water to a boil. Using tongs, transfer the nettles into a colander, and then transfer to the boiling water. Blanch for 1 ½ minutes. Meanwhile, make an ice bath with 1 tray of ice cubes and a bowl filled with cool clean water. Transfer the blanched nettles to the ice bath and let sit a few minutes and strain. Once the nettles are strained, squeeze the nettles by hand, to squeeze out the excess water. Transfer to a clean kitchen towel and spread them out. Using your scissors, cut the thicker stems off, leaving behind only the leaves and delicate stems. Measure out 2 cups of these blanched and trimmed nettles and transfer to a food processor along toasted pine nuts, olive oil, cheese, garlic, lemon juice, salt and pepper. Pulse until cohesive but not too smooth. Adjust salt, pepper, and lemon juice to your liking. Freeze what you don't use right away in a silicone ice cube tray or small glass mason jars. 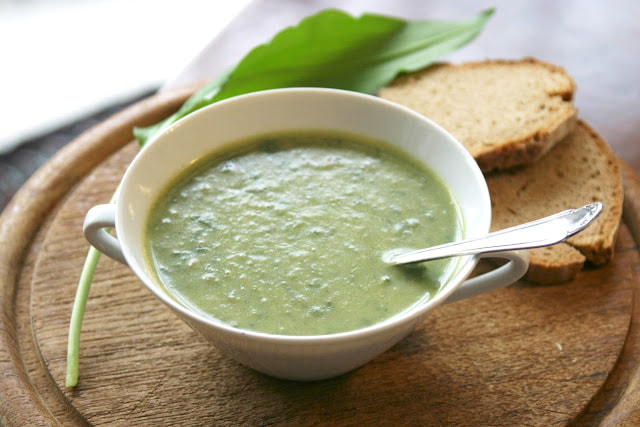 Nettle and Potato Soup
Another less work intensive recipe for nettles is simply soup! This creamy, green soup can easily be made dairy free by substituting the cream for canned full fat coconut milk. Use bone broth in place of vegetable broth to increase the protein if desired. Serves 4-6 INGREDIENTS 2 tablespoons extra virgin olive oil 2 small shallots, diced 2 cloves garlic, finely minced 3 medium sized yellow potatoes, rinsed and dice 2-3 slices bacon, cut into small pieces (or ¼ cup diced pancetta) 3-4 handfuls rinsed baby nettle leaves, base stems trimmed* 3 cups vegetable broth or bone broth 1/3 cup heavy cream (may replace with canned full fat coconut milk) 1 tablespoon honey Juice of ½ lemon Splash of apple cider vinegar (optional) Pinch of red chili flakes (optional) Sea salt and pepper to taste Garnish with fresh parsley DIRECTIONS Heat a soup pot over medium heat. Add the oil and when hot, add the shallots, garlic, diced and bacon/pancetta. Allow the shallots to turn glassy and the pancetta to turn crispy. Stir occasionally. Add the nettles to the pot sauté until wilted. Add the potatoes and pour in enough vegetable broth until the potatoes are covered. Bring the soup to a simmer for about 15 minutes, or until the potatoes are tender. Once the potatoes are tender, remove the pot from the burner, and using an immersion blender puree the soup. Return the pureed soup back onto the burner and heat on low. Next add the cream and honey. Stir well to combine. Finally, add the lemon juice and a splash of apple cider vinegar to brighten the soup. Season with chili flakes, sea salt and pepper to taste. You could even add some frozen nettle pesto if desired. Garnish with fresh parsley. Serve with buttered fresh bread and a side salad. *Note: By trimming the nettles, and leaving only the delicate stems, keeps the soup more delicate and smooth.
0 Comments
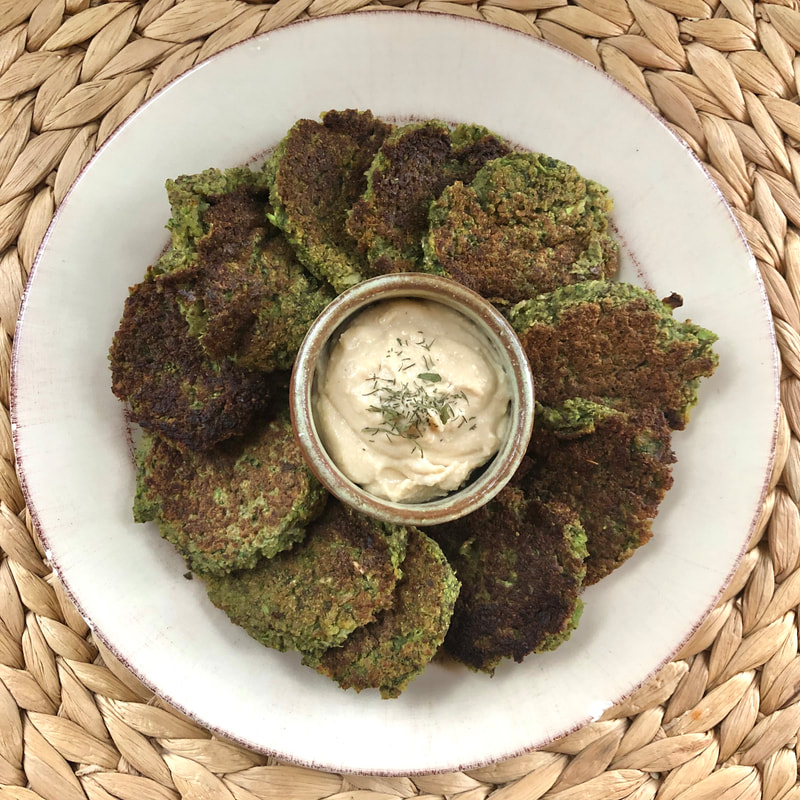
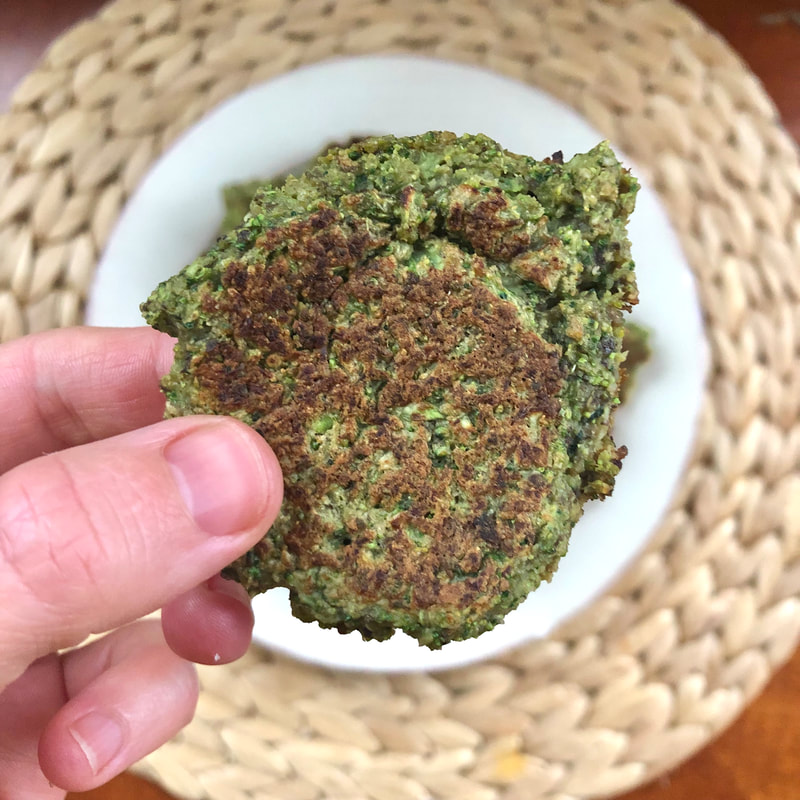
It can often be a struggle to get babies and toddlers to eat their veggies for a variety of reasons. But mostly commonly what I see is that babies and toddlers are offered plain/bland veggies. Although some may like that, I find that most do not. Babies like flavor just as much as adults do. AND adding flavor encourages them to be a more adventurous eaters as they get older. That's where these little patties come in! They are flavorful, veggie rich and nutrient dense! The nutritional yeast adds a cheesy flavor and an excellent source of B vitamins. The garbanzo flour adds protein and fiber, but most importantly acts as the binder to keep these veggie patties together. These patties can easily be adapted with different herbs/spices and cauliflower can be used in place of broccoli. Toren especially enjoys these patties with Karam's Garlic Sauce or hummus. I am sure pasta or marinara sauce would also be tasty.
Makes 12 patties Time: <30 minutes INGREDIENTS 2 cloves garlic 1 small head of broccoli (florets only, ~15) 3-4 medium crimini mushrooms 1/2 teaspoon dried oregano 1/4 cup garbanzo/chickpea flour (Bob's Red Mill) 2 tablespoons nutritional yeast (I used large flaked) 1/4 teaspoon sea salt 1 teaspoon aluminum free baking powder ~3 tablespoon water 1 tablespoon grass-fed butter/olive oil for frying DIRECTIONS Place the garlic cloves into a food processor and process until finely minced. Add the broccoli florets, mushrooms, and oregano. Process until finely minced and sticking together. In a separate medium bowl mix together the garbanzo flour, nutritional yeast, salt, pepper, and baking soda. Stir in the broccoli mixture with a spatula. Add water 1 tablespoon at a time until the mixture sticks together without being too wet, ~3 tablespoons. Heat a large skillet over medium heat. Add butter (or olive oil). Once melted and sizzling reduce heat to medium low. Using a tablespoon add the broccoli chickpea mixture to the pan, making ~ 12 patties. Flatten with spatula and cook for 3-4 minutes, then flip and cook another 3-4 minutes. Serve warm (not too hot) or room temperature with Karam's Garlic Sauce or hummus. Note: Store patties in an airtight container in the refrigerator. The patties also freeze well and can be briefly reheated in microwave (~15 seconds). Make sure to let them cool before serving. Nutrition (for 2 patties): 57kcal, 2.3g fat, 6.5g carbs, 3g fiber, 3.3g protein. Crustless Red Kuri Pumpkin Pie
I only make pumpkin pie from scratch. No cans, the real deal. It’s super easy and the flavor and texture is just so much better (in my opinion). This time around instead of using a sugar pie pumpkin, I used Red Kuri Squash because you can eat the skin and all, providing you with more nutrients, fiber, and color for less work (no peeling required). AND, if you skip the crust, you have less work and less calories, but you still have all the flavor. Plus, its naturally gluten and grain free and also Low FODMAP! Yes, I use sugar, but only a small amount. I prefer the clean sweetness of sugar over maple syrup in pumpkin pie. Plus, it doesn’t add extra liquid. During the fall months I enjoy this “pie” as a snack or as a treat, always with a generous dollop of whipped cream. Unfortunately, the Kuri Squash seeds have a much thicker hull and therefore are not as enjoyable roasted like the pumpkin seeds. But for the pie, the Kuri squash is delicious! Makes 6 Servings Time: ~80 minutes (including baking time) INGREDIENTS 1 lb Red Kuri Squash, seeds removed 3 pasture-raised eggs 4 tablespoons unrefined sugar (or more per taste preference) 2 teaspoons vanilla extract 1 teaspoon ginger powder 1 teaspoon cinnamon powder ½ teaspoon turmeric (optional) ¼ teaspoon allspice 1/8 teaspoon nutmeg ¼ teaspoon salt ¼ cup whole milk (or coconut milk) For the Whipped Cream: 1 cup grass-fed heavy whipping cream + 1 tablespoon sugar/maple syrup Garnish (optional): chopped roasted pecans DIRECTIONS Place a steamer basket into a medium pot and fill with water to just under the basket. Bring to a boil. Meanwhile, cut the Kuri Squash in half with a large sharp knife and scrape out the seeds using a metal spoon or ice cream scoop. Weigh out 1lb of pumpkin on a kitchen scale. Place this into the steamer basket and steam over medium until tender when pierced with a fork ~ 15-20 minutes. Allow to cool enough to handle. In the meantime, measure out your spices and place into a small dish and pre-heat oven to 375 degrees. Once the squash is cool enough to handle, place the 1lb of squash meat into a large bowl. Using an immersion blender, puree the meat as smooth as possible (small chunks are okay). Then add the egg, sugar, and spices. Use the immersion blender to blend until smooth. Finally add the milk, and blend until cohesive. Taste and adjust the spices/sugar if desired. Butter or oil a baking dish (or individual ramekins) and pour in the squash mixture. Place into the oven and reduce the bake temperature to 325 degrees. Bake for 30 minutes, rotate halfway, and bake for an additional 20 minutes or until set. In the meantime, pour the heavy whipping cream into a large bowl, add the tablespoon sugar/maple syrup, and optional teaspoon vanilla extract or pinch cinnamon if desired. I personally, like it plain best. Whip with beater on high until stiff peaks form. Alternatively, place all the ingredients into a quart sized jar, top with lid, and shake vigorously for ~ 5 minutes or until stiff peaks form. Remove the pumpkin pie from the oven and allow to cool to room temperature and then refrigerate. Allow the pumpkin pie to cool completely in refrigerator before serving. Top with whipped cream and chopped roasted pecans for added crunch if desired. Nutrition (per serving w/out whip): 110kcal, 17g carbs, 2.5g fiber, 3g fat, 4g protein. Nutrition (per serving w/whip): 250kcal, 20g carbs, 2.5g fiber, 17g fat, 5g protein. Compare to Traditional Pumpkin Pie with Crust: 1/8th of pie w/out whip: ~350kcal, 35g carbs, 14g fat, 5g protein. |
RecipesI hope you enjoy my creative, flavorful, and nutrient dense approach to whole foods cooking. All recipes are gluten free. Archives
December 2022
Categories
All
|
 RSS Feed

|
|
Providing custom functional nutrition therapy since 2015.
Follow HBN on Social Media!
©Happy Belly Nutrition, LLC 2015-2023