Homemade Applesauce with a Special Twist
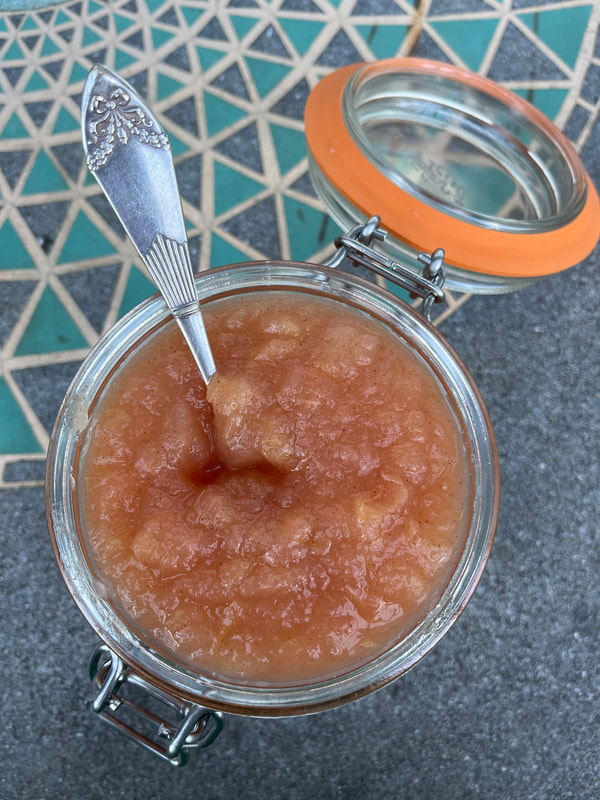
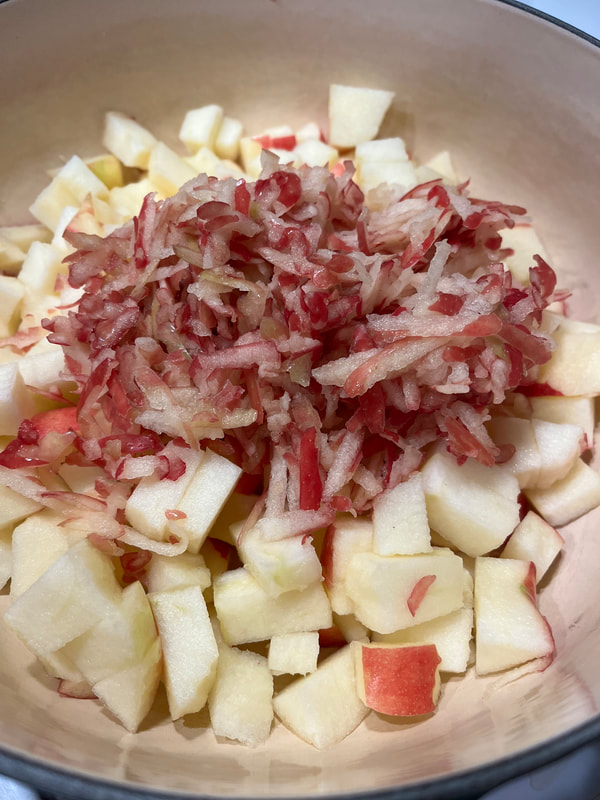
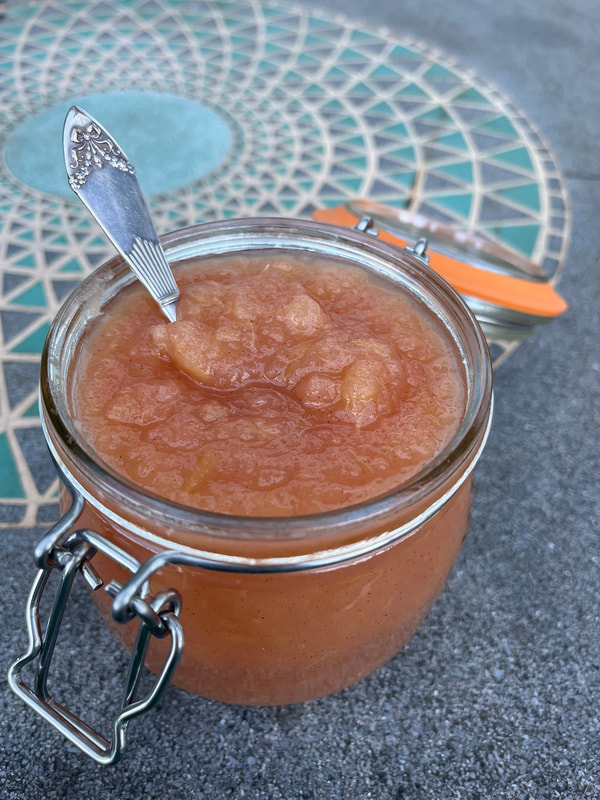
Most people peel their apples when making applesauce to keep the texture nice and smooth. But in the process they are discarding the most nutritious part! The apple peel is rich in gut loving and anti-inflammatory polyphenols including well known quercetin. Quercetin is most well known for inhibiting the production and release of histamine, thereby reducing the severity of seasonal allergies and other histamine related symptoms. The peel is also an excellent source of pectin a soluble fiber which can soothe the GI tract and can be especially helpful when struggling with diarrhea. Pectin is also fermented by good gut microbes and therefore helps support a healthy and diverse gut microbiome. Since we are keeping the peel on for this applesauce, it becomes increasingly important to choose ORGANIC apples, as conventional apples are highly sprayed with pesticides. And to help improve texture of applesauce, I recommend grating the apple peels instead of just coarsely chopping the apples. Although this is an extra step, it allows the apple peel to easily dissolve during the cooking process, leaving the texture more smooth. With the addition of the skin, and the increase in polyphenols and pectin, the applesauce is pinker in color and is thicker in texture. However, apples are rich in fructose and sorbitol, two kinds of sugars that are considered FODMAPs. If you don't tolerate either of these well, then applesauce (and apples) may trigger uncomfortable digestive symptoms until the underlying cause is addressed, such as SIBO (small intestinal bacterial overgrowth), which can lead to fructose malabsorption. Some people unfortunately, struggle with hereditary fructose intolerance, and will have to limit fructose entirely to avoid uncomfortable symptoms. Applesauce INGREDIENTS Organic apples Filtered water Lemon juice Spices (fresh ginger root, cinnamon, vanilla, etc) Sea salt Sweetener of choice (optional) - depending on the type of apple you may need more of less DIRECTIONS Wash your apples and grate the peels. Cut out the core and dice up the remaining apple flesh. Add the grated peels, apple bits, water, lemon juice, and your choice of spices to a large pot, cover, and bring to a simmer. Simmer until tender, about 15-20 minutes depending on the size of the chunks. Remove lid, and mash with a potato masher or whisk, stir in salt, and optional sweetener to taste. You may continue to simmer uncovered for a couple of minutes to evaporate excess water if needed until desired texture is achieved. Transfer to a sealable glass jar and enjoy. I love it with Nancy’s whole milk yogurt or cottage cheese. Show me your applesauce making skills!!
0 Comments
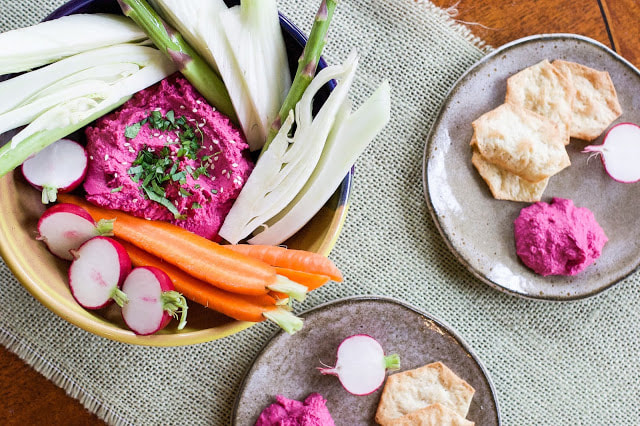 Hello my friends! Say hello to Summer weather! After such a grueling long winter, with months of clouds and rain, we now have the blue skies we have been longing for. To celebrate this wonderful change in seasons I have two super tasty recipes to share with you today. One was inspired by my favorite restaurant in town, the Temple Bar. I have never really eaten hummus as a meal. But after having such a wonderful experience, I am now a hummus advocate, especially in the summer. No longer is hummus just a spread or a dip for an easy snack, but it can easily become a hearty and satisfying meal...just make the portion size larger! Plus once you try the recipes below...you will never want to go back to store bought hummus...honestly. These recipes are creamy, super tasty, and budget friendly. A win-win situation. Secrets on How To Make The Perfect Hummus First of all the big difference is I start with dry chickpeas. If you want a creamy, smooth, and delicate hummus, you have to start from scratch. Trust me, the little extra forethought is worth it! Otherwise you will get chunky, thick, and gritty hummus. Secondly, you must choose Pedrosillano Cafe Garbanzo Beans. These smaller versions of your traditional chickpea, are the choice for hummus makers because they are creamier in consistency and have a nuttier flavor. Luckily you do not have to look far. If you live in Bellingham, you can find these in the BULK section of the Bellingham Food Co-op. For the rest of you, if you can't find them at your local health food store, I encourage you to purchase them online. Thirdly, especially for the traditional hummus, try serving it warm. Yes, warm! Of course you can still eat it cold, but warming up the hummus increases the aroma and tastes much more satisfying and satiating than cold hummus. At least...in my opinion. Versatility of Hummus Many people enjoy hummus with vegetables and crackers like shown above. However, you can serve hummus as a base, topped with grilled or baked fish. You can even top it with some lamb or grass-fed beef. Also, you can layer hummus like a "bean dip". Simply put a layer of hummus in a dish, top with finely diced cucumber, bell peppers, or tomatoes, and fresh herbs, drizzle with olive oil and sprinkle with salt. This is great for easy dipping! Of course you can also use it as a spread on sandwiches and wraps. However, I just love the simplicity of serving it alone with fresh seasonal veggies (raw, steamed, or roasted), especially in the summer. Now get soaking! Whether you make the beet or traditional version, you will love it!  Traditional Middle Eastern Hummus Hummus made from scratch is easy, cheap, and the quality is far better than what you can find at the grocery store. I personally love to make a batch of traditional hummus, scoop out half from the processor, and then add additional spices or veggies for some extra FLAVOR and FUN. Then I have two flavors in one single batch. Alternatively, you can make a whole batch of beet hummus if you want (recipe below). Also, hummus freezes wonderfully! If this batch is too much hummus, put half in the freezer for another warm Summer day. Makes about 3 cups (serves 4-6) INGREDIENTS 1 cup dried Pedrosillano café garbanzo beans (smaller chickpeas) 1 1/2 teaspoons baking soda, divided 1/2 cup tahini paste (organic toasted) Juice of one large lemon (~3-4 tablespoons) 3 garlic cloves, coarsely chopped 1 teaspoon Real sea salt Extra virgin olive oil Maldon's Salt (optional, but almost necessary in my opinion) Other Add In's If Desired Fresh Herbs (oregano, thyme, rosemary, etc) Spices (chipotle, cumin, curry, etc) Steamed or roasted beets or carrots Additional Toppings Smoked paprika (optional) Roughly chopped parsley (optional) DIRECTIONS Place the chickpeas into a bowl and cover with double their volume of cold water. Add 1 teaspoon baking soda to the chickpeas. Soak the chickpeas overnight, at least 12 hours. The next day, drain and rinse. Place the soaked chickpeas and remaining ½ teaspoon baking soda in a medium saucepan and cover with double their volume of cold water. Bring to a boil, then simmer on low for 30-45 minutes, or until soft and easy to mush. Spoon off foam during cooking. Add more water during cooking if necessary to keep them immersed. Strain the chickpeas and retain a little of the liquid. Alternatively, you can cook the chickpeas in the InstantPot on high pressure for 8 minutes. Then let the pressure naturally release for ~10 minutes, then release the vent manually. Transfer the warm chickpeas to a food processor, add the tahini, 1/4 cup lemon juice, garlic, and sea salt. Process for 1-2 minutes, or until totally smooth. Add some of the cooking liquid if additional liquid is needed and process again. You want the mixture to be very soft and smooth. Taste and add more salt if you like. Keep warm. At this point if you want to make a half/half batch, transfer half of the traditional hummus into a glass container. Then add 1-2 steamed medium beets for a beet hummus, some roasted carrots for carrot hummus, or 1-2 tablespoons chopped fresh herbs (like oregano, thyme, rosemary, etc) to the processor and blend until smooth. Sometimes I like to add some chipotle powder or smoked paprika to my beet hummus or some cumin to my carrot hummus. There are so many wonderful ways to adapt the traditional hummus recipe! To serve, place some of the warm hummus on a plate, and drizzle with olive oil and add a pinch Maldon's Sea Salt. Sprinkle with paprika and fresh parsley if desired. If the hummus has cooled down already, then reheat for 30-60 seconds in the microwave, stir, and add toppings. Adapted by Selva Wohlgemuth, from Plenty by Yotam Ottolenghi Pretty in Pink Beet Hummus Makes about 4 cups (serves 4-6) INGREDIENTS 1 cup dried Pedrosillano café garbanzo beans 1 ½ teaspoons baking soda, divided 2 medium steamed red beets, peeled and quartered ½ cup tahini paste (organic toasted) Juice of one lemon (about 3-4 tablespoons) 3 garlic cloves, coarsely chopped 1 teaspoon Real sea salt ¼ teaspoon chipotle powder (optional) Extra virgin olive oil Maldon's Sea Salt DIRECTIONS Place the chickpeas into a bowl and cover with double their volume of cold water. Add 1 teaspoon baking soda to the chickpeas. Soak the chickpeas overnight, at least 12 hours. The next day, drain and rinse. Place the soaked chickpeas and remaining ½ teaspoon baking soda in a medium saucepan and cover with double their volume of cold water. Bring to a boil, then simmer on low (very gently) for 30-45 minutes, or until soft and easy to mush. Spoon off foam during cooking. Add more water during cooking if necessary to keep them immersed. Strain chickpeas when done. Transfer the warm chickpeas to a food processor and add the beets, tahini, lemon juice, garlic, sea salt and optional chipotle powder. Process for 1-2 minutes, or until totally smooth. You want the mixture to be very soft and smooth. Taste and add more salt if you like. Keep warm. To serve, place some of the warm hummus on a plate, and drizzle with olive oil. Sprinkle with Maldon's sea salt. Note: For how to instructions on steaming beets check out this recipe for steamed beet salad. Are you a hummus fan too? What is your favorite version hummus? Share below!
Eat Happy, Selva 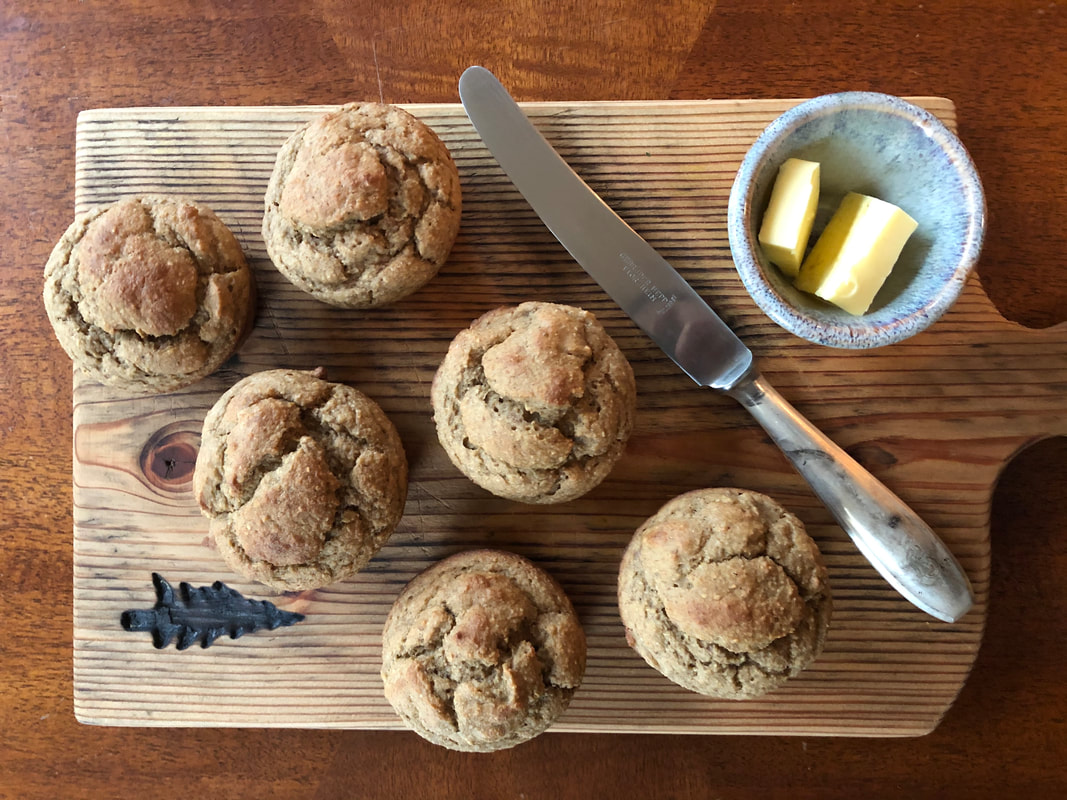 When the weather turns gray and the rain drums lightly on the roof, I want to bake. It just brings a sense of cozy into the home by wafting smells of cinnamon spice throughout the house. Perhaps I am constantly nostalgic for the Fall, but even with the rainy days of late Spring, these muffins do not disappoint. Since I am a mother of a toddler, whatever I bake needs to be quick and cannot dirty too many dishes. If Toren gives me a 30 minute window of self-play, then I am lucky. So here is what I whipped up this time. APPLE BANANA BREAKFAST MUFFINS!! If you are a fan of apple, banana, and cinnamon, then this recipe is for you! Sweetened only with whole fruit, these muffins are naturally free of refined sugar. They are fluffy yet fiber rich, and an excellent alternative to otherwise sugar laden muffin recipes. I am not a fan of sugar replacements, and encourage the use of fruit, as nature intended, to sweeten recipes. Not only does this practice encourage the consumption of whole foods, it also increases the fiber and polyphenol content. Flaxseeds further boost the fiber content and provide a lot of health benefits including supporting healthy bowel movements, balancing hormones, and reducing inflammation. This little seed may be small, but it is mighty! Plus, the polyphenols in the oats, apple peel, and cinnamon support the growth of bifidobacterium and lactobacillus two groups of good gut bacteria known to support human health in a wide variety of ways. 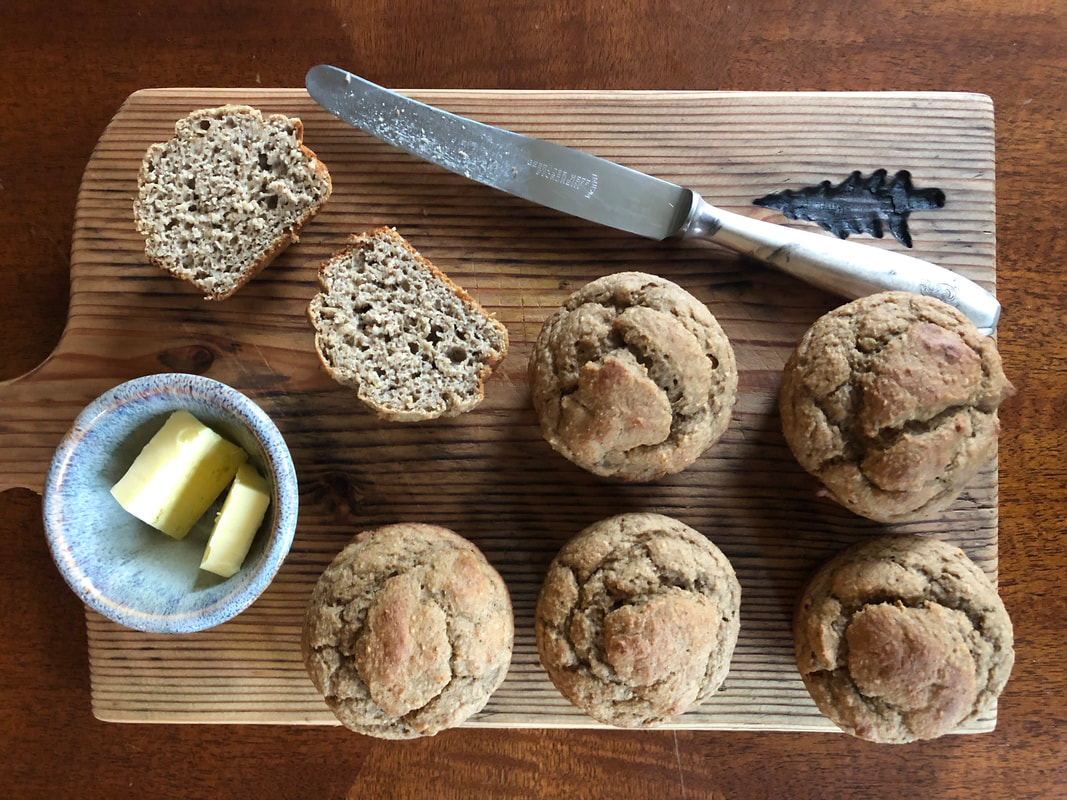 Although these muffins are gluten free, they are not dairy or egg free. If you want to play around with these additions let me know how it turns out! Also, of importance, when grating the apple make sure to leave the skin on because most of the polyphenols are found directly beneath the skin. Don't let the skin go to waste. I also opted not to use muffin liners, because I feel the muffins rise better when placed directly into an oiled muffin tin. You can easily make a double batch and freeze the leftovers. These muffins taste just as good fresh out of the oven as they do reheated in the microwave or toasted in the toaster. With a pat of butter or nut butter they taste extra yummy too. And yes, my little toddler loves them as much as I do! Apple Banana Breakfast Muffins Makes 6 Muffins INGREDIENTS 1 cup rolled oats 1 medium banana 1 medium apple, grated with skin on 1/4 cup ground flaxseed (also known as flaxseed meal) 1/4 cup whole milk yogurt (I used plain Grace Harbor Farms yogurt) 1 large egg 1 teaspoon ground cinnamon 1 teaspoon vanilla extract 1/4 teaspoon sea salt 2 teaspoons baking powder 1/4 teaspoon baking soda DIRECTIONS Preheat oven to 350 degrees. Meanwhile add all of the ingredients except the baking powder and baking soda to a high speed blender (I have a BlendTec). Blend until smooth, about 60 seconds or so. I am sure a good quality food processor would work well too. Then sprinkle in the baking powder and baking soda and blend for another 10 seconds, just until incorporated. Oil six spots of a regular muffin tin with butter or olive oil and transfer the mixture evenly into all spots. Place into oven and bake for 30-35 minutes. Remove from oven and allow the muffins to cool in the muffin tin for 10-15 minutes undisturbed. Then gently remove the muffins and enjoy! For a balanced breakfast consider pairing these muffins with a protein rich meal such as veggie scrambled eggs. I would love to know what you think of these little gems! Share your adaptations below, so others can learn from you as well :)
Happy Eating, Selva |
RecipesI hope you enjoy my creative, flavorful, and nutrient dense approach to whole foods cooking. All recipes are gluten free. Archives
December 2022
Categories
All
|
 RSS Feed

|

|
Providing custom functional nutrition therapy since 2015.
Follow HBN on Social Media!
©Happy Belly Nutrition, LLC 2015-2023